Authenticating Your C# Application for the Google Cloud Platform – Part 1
This post is part of the series: Using Google Cloud Platform With C#
- 1. Authenticating Your C# Application for the Google Cloud Platform – Part 1
- 2. Authenticating Your C# Application for the Google Cloud Platform – Part 2
- 3. C# Support for the Google Cloud Platform
- 4. Using Google Services in UWP C# Apps — Part 1
- 5. Using Google Services in UWP C# Apps — Part 2
The new C# libraries for the Google Cloud Platform, available on NuGet, make it easy to get started adding these features to your platform. However, before you can use them, you obviously need to authenticate your application for access.
Google uses OAUTH 2.0 as the protocol for authentication In this post we’ll discuss the different scenarios you may encounter, and the different options available for authorizing your application.
Server to Server Authentication
If you are building an application that is leveraging GCP infrastructure as its platform, you only need to authorize your application to your own Google project. For example, you may be building an app that stores data in a Google Cloud Storage, owned by you, setup for your own application.
Sample Project
To demonstrate this, I’ve created a very simple project that reads the list of buckets in a Google Storage account and writes them to the console. Here’s the code which uses the StorageClient API:
class Program
    {
        private const string PROJECT_ID = "falafel-test-project";

        static void Main(string[] args)
        {

            try
            {
                var client = StorageClient.Create();
                var buckets = client.ListBuckets(PROJECT_ID);
                foreach (var bucket in buckets)
                {
                    Console.WriteLine(bucket.Name);
                }

            }
            catch (Exception ex)
            {
                Console.WriteLine(ex);
            }

            Console.ReadLine();
        }
    }
Note the Project ID property, which you can retrieve from your project dashboard:

Of course, if we run this code now, without authorizing it first, we’ll get an error like this:
System.InvalidOperationException: The Application Default Credentials are not available. They are available if running in Google Compute Engine. Otherwise, the environment variable GOOGLE_APPLICATION_CREDENTIALS must be defined pointing to a file defining the credentials. See https://developers.google.com/accounts/docs/application-default-credentials for more information.
To fix this, we need to first authorize our application. The recommended (and simplest) option to achieve this is to leverage Google Default Application Credentials.
Google Application Default Credentials
The preferred method for authentication your application is to leverage the Google Application Default Credentials via the gcloud utility, which is part of the Google Cloud SDK. Be sure that you have already installed the SDK on your machine before proceeding.
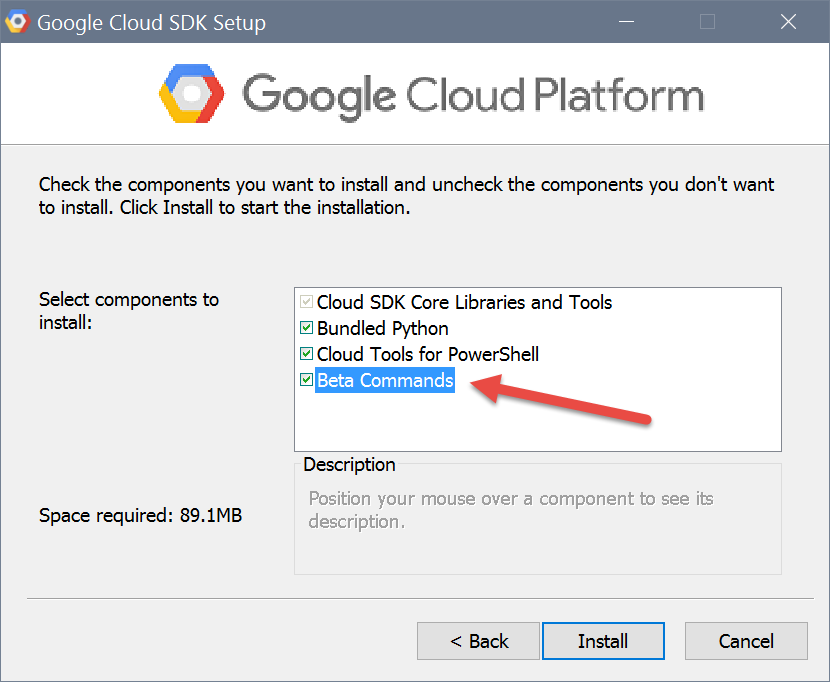
Beta Tools
As of the writing of this entry, the command to configure the Google Application Default Credentials are still in beta. Be sure to check that option during installation of the SDK to ensure the command is available:
Alternatively, if you installed the SDK without this option, you can manually add the beta tools by running this command via the SDK:
gcloud components install beta
Note: If you have issues, try running the command as an Administrator.
Once the SDK is installed, run this command to start the process:
gcloud beta auth application-default login
This will launch a browser to start the authentication process.

Log in with the Google credentials associated with your project, and when complete your machine will be setup to access the GCP resources you have enabled for each project. This is done by downloading a file with the associated credentials to your machine (AppData for Windows).
It’s important to understand that this authorizes your entire machine to access your projects via the credentials you authorized. The good news about this is that as new projects are added or updated), your credentials automatically grant access, meaning you don’t have to continuously run the utility to access new project resources from your custom applications.
Now that your machine is authorized, you can call the cloud APIs directly, without any authentication credentials, as they will automatically pull them from your authorized machine. You simply need to specify the project id, and of course, have enabled desired service for the project.
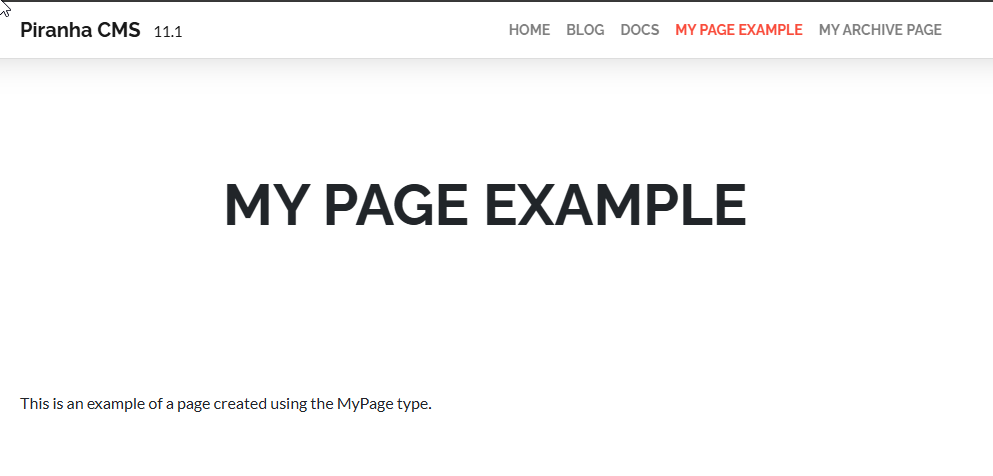
If we run the same project again (after creating a few empty buckets in the storage dashboard), we’ll see our list of buckets as expected, without having to specify any authorization credentials to the code:

There are two significant advantages to this setup. First, you don’t have to concern yourself with accidentally checking in important, secret keys to source control, as they are stored in your local machine.
Second, both the Google App Engine and the Google Cloud Engine are already configured to use the same credentials, so if you are deploying your application to either of these services, your app will “just work” without having to manage config files or settings for the different environments.
Of course, this does mean that if you have more than one environment (or additional developers with their own environments) that each needs to remember to perform this step so their projects have access.
Revoking Default Credentials
If your work is done or you want to deauthorize a machine, you can do so via the same command-line utility, as described here: https://cloud.google.com/sdk/gcloud/reference/auth/application-default/revoke
Simply run this command and your machine will be deauthorized (the JSON file will be deleted).
gcloud auth application-default revoke
Setting Default Credentials Manually (Service Account Key)
If you do not have the SDK installed or are unable to install it for whatever reason, you can still leverage the Default Credentials by downloading the service key file manually from your account, and setting an environment variable pointing to its location.
To do this, start by going to the API Console Credentials page for your project: https://console.developers.google.com/project/_/apis/credentials
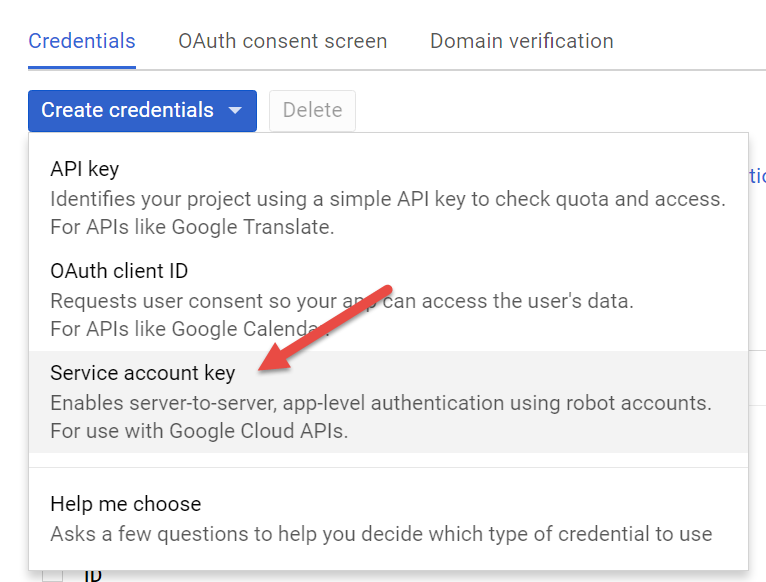
Create new credentials, selection the option for “Service account key”:
You will be prompted to select or create a service account (more on this later) which will be the account used to access your resources. For now we’ll use the default credential created by Google when we setup the project.
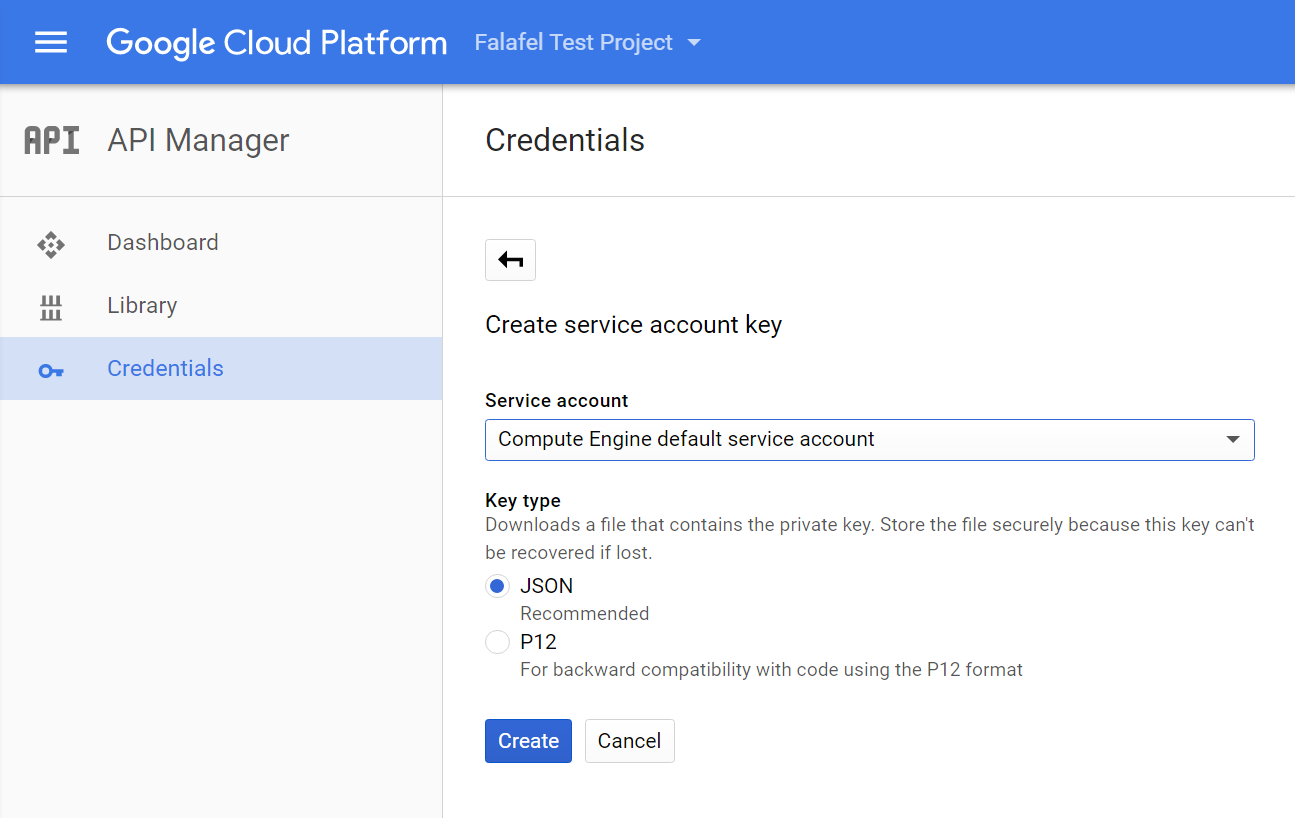
Select JSON for the key type and create the credential, saving it to a specific location you can find later. In my case I saved it to C:\Google.
Next, create an environment variable, pointing to the file at the location you saved:
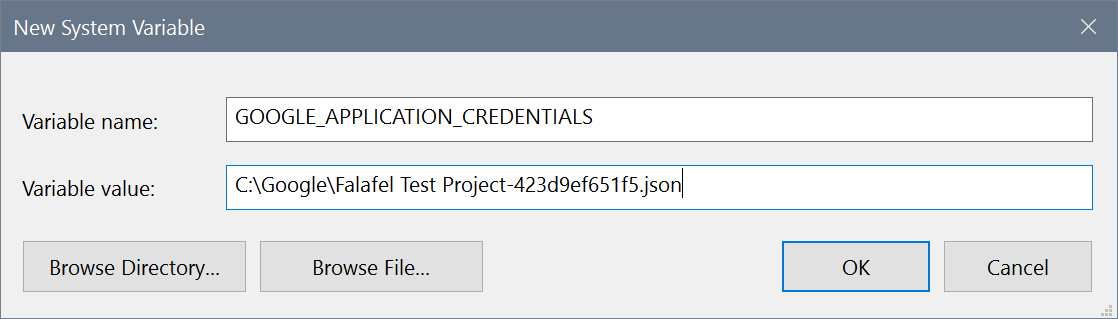
Note: You may need to reboot before this variable is available.
Now you can run the project again and it will successfully authenticate and run.

However, it’s important to understand the difference between using the Service account key and the Default Credentials. Whereas the Default Credentials will authorize against your entire Google account, the Service account key authorizes against a specific service account defined for a particular project.
If you attempt to change the project id to one to which the service account does not have access, you’ll get an error like this:
The service storage has thrown an exception: Google.GoogleApiException: Google.Apis.Requests.RequestError
Forbidden [403] Errors [
Message[Forbidden] Location[ – ] Reason[forbidden] Domain[global] ]
This also means that you can only authorize one service account at a time, so be sure that you are leveraging the appropriate key and location.
Upon deployment to GAE or GCE, your code will again “just work” because as mentioned previously these environments are already configured for access.
Note: If you have both Default Credentials setup AND added the environment variable specified here, the environment variable will take precedent and this credential will be used instead of any others.
If you’re deploying to a different environment over which you don’t have direct control to set the environment variables, you’ll need another way to authorize your application, and for that we will need a service account.
Creating a Service Account
A Service Account is a credential (including a unique email address) you create that will be used to access GCP resources in a specific project. Although the Default Credentials are simple, and recommended you may have need to explicitly authorize your application against a specific credential. One reason in particular is if you need to access resources from more than one account in the same application, or as an account different that the default one associated with the machine.
To create a credential for your own project you need to open the Service Accounts page here: https://console.developers.google.com/permissions/serviceaccounts
Note: If you are using Google Compute Engine, a default service account will automatically be created for you.
You must first select the project, either by clicking the button labeled “Select a project” or selecting one from the “Project” dropdown menu at the top. Creating an account brings up a dialog to define it:
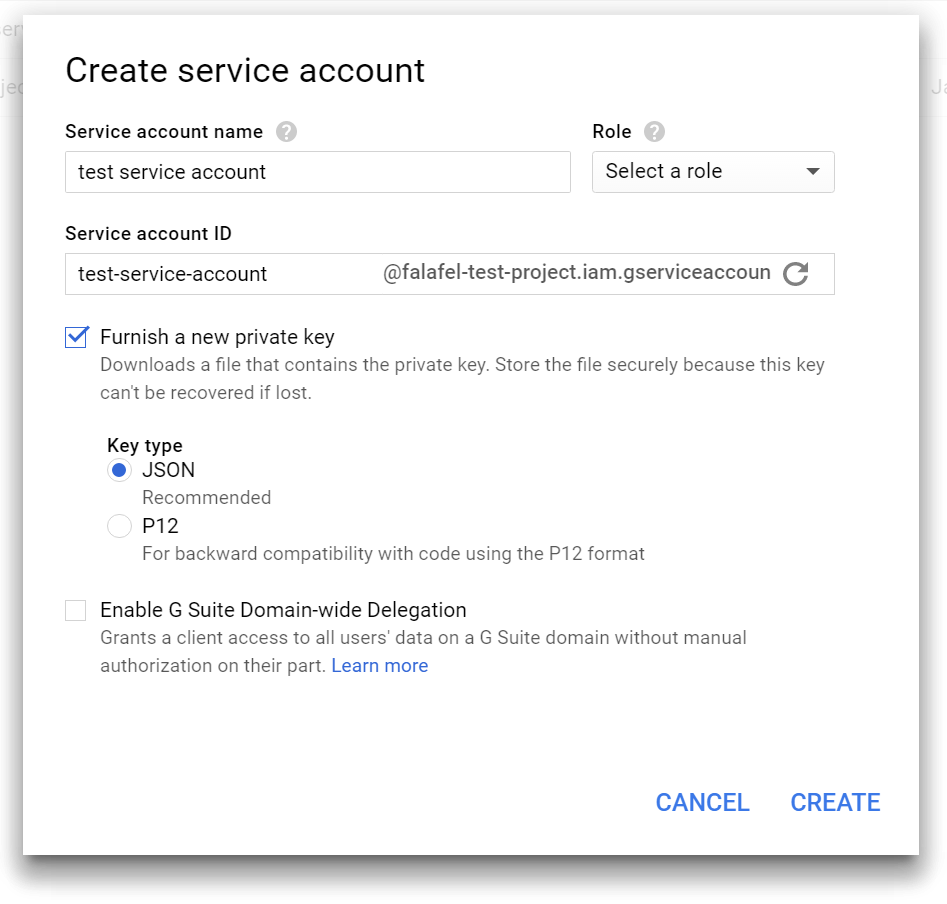
You can assign specific roles if necessary, as well as enable G Suite Delegation if you’re using it (more info here), but for now we just want to generate the keys that we’ll need to authenticate the platform.
You can choose between JSON and P12 formats for the private key. However, it appears that for the new .NET libraries, only the JSON option is supported (P12 is for legacy applications not using the new libraries), so we’ll select that option.
Upon creation, the appropriate file will be immediately downloaded to your machine. This is the only time the private key will be generated and available, so keep it safe!
Now that we have a service account created, we can proceed to use the keys to create Google Credentials for accessing GCP services of the project.
Creating Credentials from JSON Key
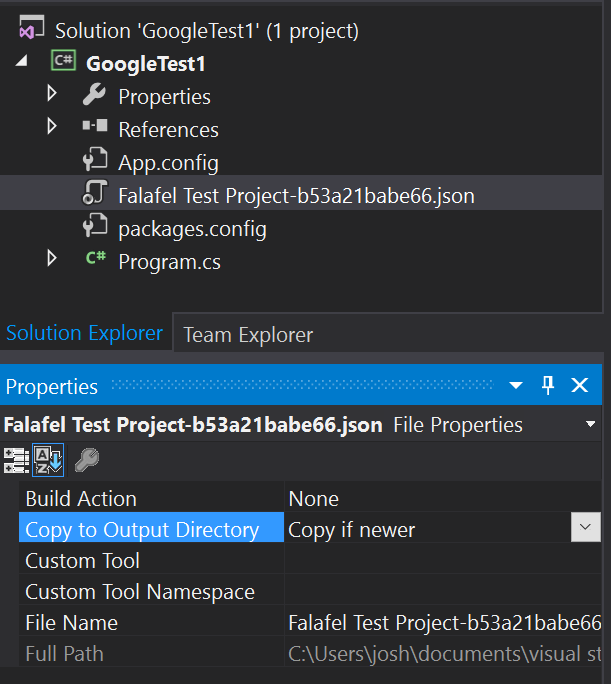
To generate the Google credentials, your C# application needs to be able to access the JSON key file. For our example, I’ve added the key to the project, copying it to the output directory on build.
Now all I need to do is use this file to generate the appropriate credential and pass it to the service. Here is the modified code, changing just the first two lines inside the try/catch to use our key file instead of the Default credentials:
static void Main(string[] args)
        {

            try
            {
                var credential = GoogleCredential.FromStream(new FileStream("Falafel Test Project-1c0bc1595ad8.p12", FileMode.Open))
                    .CreateScoped(new string[] { StorageService.Scope.DevstorageReadOnly });
                var client = StorageClient.Create();


                var buckets = client.ListBuckets(PROJECT_ID);
                foreach (var bucket in buckets)
                {
                    Console.WriteLine(bucket.Name);
                }

            }
            catch (Exception ex)
            {
                Console.WriteLine(ex);
            }

            Console.ReadLine();
        }
Running the project now reveals the same result, assuming of course that we are using the proper key for the account that has access to this project.
You’ll want to be careful when using this option, because obviously you now have your private key exposed inside the project; be sure to exclude this from source control!
Wrapping Up and Next Steps
There are several options for authenticating C# applications to access the Google Cloud Platform. While the Google Default Credentials are simple, powerful, and above all recommended, if you need more control over the authentication process, you can authorize your applications against specific service accounts by creating private keys for each application.
In this case we’ve authorized our application to access our own account resources, also known as two-legged (server to server) authentication. If your application needs to access, process, or edit resources of an end user, we need to first ask for permission. This is called three-legged authentication, and is the subject of our next post.
Until then, as always, I hope this was helpful and thanks for reading!
Enjoyed this post and/or found it useful?
Tagged with:
SelAromDotNet
Josh loves all things Microsoft and Windows, and develops solutions for Web, Desktop and Mobile using the .NET Framework, Azure, UWP and everything else in the Microsoft Stack.
His other passion is music, and in his spare time Josh spins and produces electronic music under the name DJ SelArom.