In the first few posts of this series on Piranha CMS we setup a new instance of a site using Razor Pages and saw how the conventions used by the models and routing make it easy to create and serve different types of content to the site.
However, out of the box, the StandardPage, StandardPost, and StandardArchive models have no fields for storing custom data; they only serve as empty containers for adding Blocks of content. While this is likely sufficient for most simple pages, you probably want to be able to have additional properties for content like blog posts and other aggregate items you create such as News or Events.
In this post, we'll look at how you can customize your models to with additional fields that will let you store these properties with the content type. This ensures, for example, that every Blog Post you create has a field for storing the name of the author, or perhaps a link to an optional video that would be placed in a fixed position in the post template.
Adding fields is simple in Piranha, but they are not added to the models directly. Rather, they are first added to a Region, which is then added to the model. Let's take a closer look.
Adding Regions to the Model
Regions in Piranha CMS represent a related collection of fields that are applicable to all instances of that type. A region is simply a plain-old C# object (POCO) that you define with two or more custom properties.
For example, here�s a simple region class to store some metadata about a post (we�ll add the fields in the next section):
public class MetaRegion
{
	// Fields to persist custom metadata properties go here
}
To complete the definition, simply add this class as a property to the StandardPost model, and decorate it with the [Region] attribute:
[PostType(Title = "Standard post")]
public class StandardPost : Post<StandardPost>
{
    [Region]
    public MetaRegion Meta { get; set; }
}
You can add multiple regions by repeating this process with different classes hosting different fields, allowing you to partition your fields by region:
public class MediaRegion
{
	// a different set of fields for media go here
}

[PostType(Title = "Standard post")]
public class StandardPost : Post<StandardPost>
{
    [Region]
    public MetaRegion Meta { get; set; }

    [Region]
    public MediaRegion Media { get; set; }
}
Adding these regions to the model will surface a new UI section for the content type, one for each region.
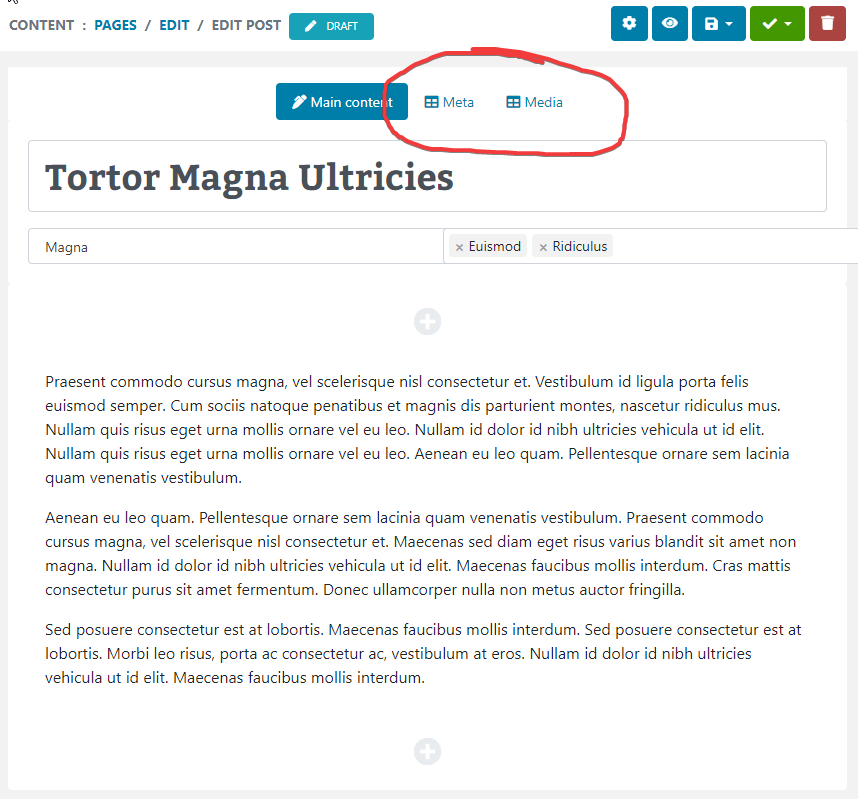
Important Note: If you add these Regions empty as we have, without any actual fields, you will not see these sections added to the UI, as there would be no fields to show. The screenshot above was taken after adding the fields in the next section, so don�t be confused if you don�t see them yet!
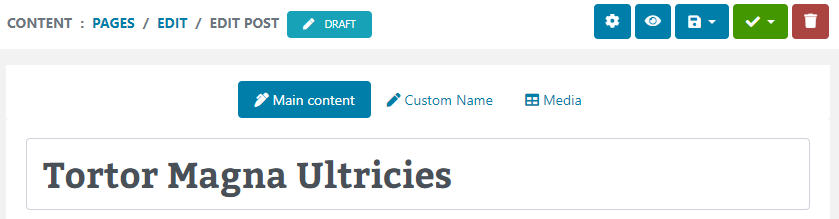
As you can see it uses a naming convention, dropping the �Region� part of the class name to label the regions. You can override this (among other settings for the region) with added properties to the Region attribute:
    [Region(Title = "Custom Name", Icon = "fas fa-pen")]
    public MetaRegion Meta { get; set; }
Be sure to check the Region documentation for a complete list of the properties you can customize at the region level.
Now that we have defined our regions, let�s look at the different types of fields we can add to them.
Adding Fields to Regions
An important thing to understand about adding custom fields to a Region is that while Regions are defined as POCOs, the individual fields must be of specific supported types.
Several types are included and supported out of the box, from simple types such String for a single line of text, Text for multi-line text, to validating types like Number and Date. More complex content is supported via Html and Markdown fields, and there are even content-based fields for selecting things like Color, Video, and even selecting your own custom content types!

Adding new fields to these types is as simple as defining a public property of the appropriate supported Field type, with a Field attribute, that can also be customized with additional properties:
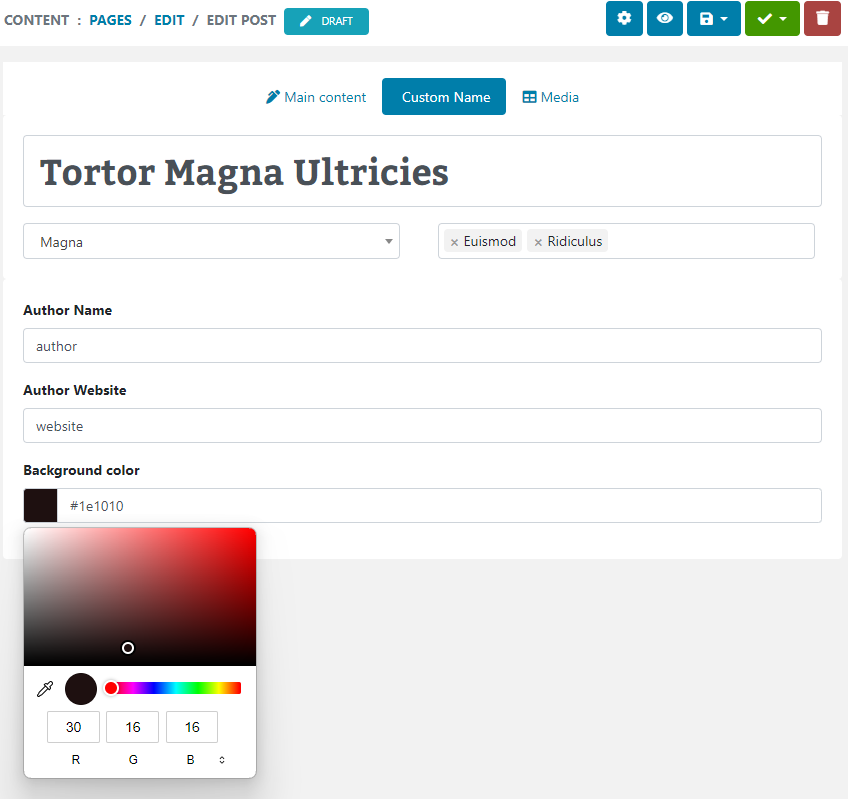
public class MetaRegion
{
    [Field(Title = "Author Name")]
    public StringField Author { get; set; }
    [Field(Title = "Author Website")]
    public StringField AuthorLink { get; set; }
    [Field(Title = "Background color")]
    public ColorField BackgroundColor { get; set; }
}

public class MediaRegion
{
    [Field(Title = "Video")]
    public VideoField VideoUrl { get; set; }
    [Field(Title = "Video Caption", Description = "Max 50 characters")]
    public StringField VideoCaption { get; set; }
}
Building the updated project with these fields reveals helpful, validating inputs of the appropriate type automatically!
Important Note: Rather than simple C# primitives like string or int, you need to use the appropriate Field type like StringField or NumberField. If you don�t, you won�t get any errors or exceptions, but no field will be rendered to the UI nor will any data be persisted.
Single Field Regions
There is one important caveat to this process when dealing with a single custom field. Regions with a single field are actually not supported by the serializer that manages them.
If you want to add a region with a single field, you instead add the desired supported field as a property to the model directly. However, instead of decorating the property with the Field attribute, you use the Region:
[PostType(Title = "Standard post")]
public class StandardPost : Post<StandardPost>
{
    [Region(Title = "Custom Name", Icon = "fas fa-pen")]
    public MetaRegion Meta { get; set; }

    [Region]
    public MediaRegion Media { get; set; }

    [Region(Title = "Single Date Field", Description = "Select a date")]
    public DateField SingleDateField { get; set; }
}
This will render that single field in its own section:

Be sure to remember this, as adding a single field to a Region won�t work, but you won�t get any errors or exceptions to remind you!

Creating Custom Field Types
Although the built-in fields of Piranha are extensive, covering a wide range of use-cases, you are not limited to just these. It is absolutely possible to define your own custom fields for use in any of your models.
The process for doing this is in the official docs for Piranha, but we will take a closer look at this specifically in a future post, so stay tuned!
Rendering Fields on the Page
Since these fields are just properties on the content type class, they are immediately accessible to your Razor pages via the model. In our example above, we added the fields to the StandardPost class, so we can access these directly as properties in the Razor page:
@page
@using Piranha.Models
@model SinglePostWithComments<StandardPost>
@{
ViewData["Title"] = !string.IsNullOrEmpty(Model.Data.MetaTitle) ? Model.Data.MetaTitle : Model.Data.Title;
var hasImage = Model.Data.PrimaryImage.HasValue;
var archive = await WebApp.Api.Pages.GetByIdAsync(Model.Data.BlogId);
}
@section head {
@WebApp.MetaTags(Model.Data)
}
<!-- header ommitted for brevity -->
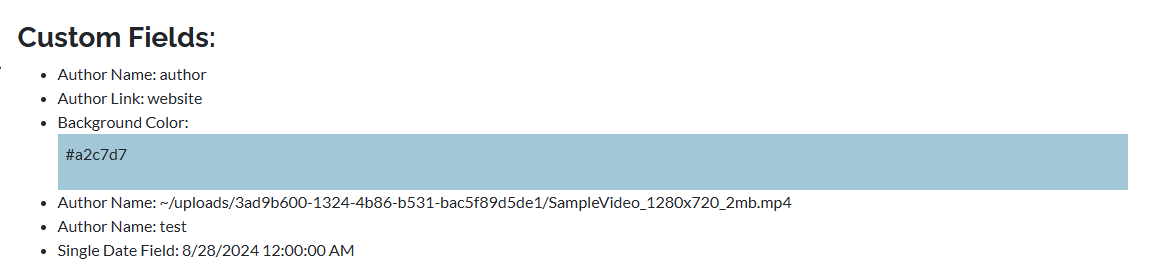
<main>
<div class="container">
<h3>Custom Fields:</h3>
<ul>
<li>Author Name: @Model.Data.Meta.Author</li>
<li>Author Link: @Model.Data.Meta.AuthorLink</li>
<li>Background Color: @Model.Data.Meta.BackgroundColor</li>
<li>Author Name: @Model.Data.Media.VideoUrl</li>
<li>Author Name: @Model.Data.Media.VideoCaption</li>
<li>Single Date Field: @Model.Data.SingleDateField.Value</li>
</ul>
</div>
</main>
They�ll render out exactly as you mark them up:

Even better, since this is all framework stuff, you can even create display templates for the fields, so you can centralize their markup for easy reuse. Just make sure to name the files to match the Field Type, and not the field name, or it won�t work!
For example, for the BackgroundColor field we created, the field type is ColorField. To render it, I created a Display Template called ColorField.cshtml with the following markup:
@model Piranha.Extend.Fields.ColorField

<div class="p-2" style="background-color: @(Model.Value)">
    <p>@Model</p>
</div>
and updated the Razor page view to use it:
<li>Background Color: @Html.DisplayFor(m => Model.Data.Meta.BackgroundColor)</li>
And now the field will render with that template:
With custom fields in Piranha it�s a snap!
Wrapping Up and Next Steps
Piranha CMS makes it easy to define custom fields and regions to organize them, and supports a number of useful fields (and editors!) out of the box. You can use these to create custom content types of all kinds, with rich support for text, media, and selectors for all kinds of values, including other types.
Rendering the field values is as simple as calling the custom properties from the page, with support for Display Templates making it a snap to create richer, reusable layouts for them.
Now that we understand how to create custom types using custom fields, in our next post, we�ll see how I leveraged those features to add support for the Series of posts for this site, such as this series you�re reading now!
Until then, as always, I hope this was helpful, and thank you for reading!