Getting Started with Piranha CMS
Content Management Systems (CMS) come in all shapes and sizes, and vary as much in their feature set as their price and target audience. Many of the established systems continue to operate as an "all in one" system, running both the backend administration as well as the front end public-facing site. However, most if not all are on a path to at least support the headless model, if not outright exclusively requiring it. That's not to mention the newer competitors, built from the ground up to support headless operation running in the cloud as Software-as-a-Service (SaaS).
Choosing a CMS is a topic all on its own, and while each have their merits, if you're looking to power a small to medium-sized site and need something with a quick setup, short learning path, and easy customization (and are a .net developer!) you can hardly do any better than Piranha CMS. It supports both an integrated and headless setup, and installs easily into an existing .net core site!

In this post, we'll spin up an instance using its provided Visual Studio templates and take a quick tour of the application, it's awesome features, and how easy it is to get started, and even customize!
In later posts, we'll look at how you can add also easily add the CMS to an existing .net application (even a Blazor one!) to quickly add content management to a custom size. For now tho, let's start by installing the templates and firing one up!
Note
Since Piranha CMS is a .net core application, you of course need to have the .net sdk installed, currently version 8 as of this writing so be sure to set that up first!
Piranha CMS Visual Studio Templates
Getting started with Piranha CMS is a snap thanks to the Visual Studio templates it provides. Once you have the .net cli installed, just run this command to install the templates so they're available for setting up a new project:
dotnet new -i Piranha.Templates
This installs three templates to choose from: a version that uses Razor pages, a version that uses MVC, and a blank one that just registers the CMS for the backend, allowing you to use either Razor, MVC, both, or neither (using the Piranha CMS API directly such as for a SPA).
You can create a new template using the CLI (this example uses the Razor pages option, which I recommend and will be using):
dotnet new piranha.razor
You can pass a number of parameters to this, such as setting the database and storage options:
-d|--database   Specifies the database provider that should be used
                    SQLite        - Use SQLite as database
                    SQLServer     - Use SQL Server as database
                    MySql         - Use MySql as database
                    PostgreSql    - Use PostgreSql as database
                Default: SQLite

-s|--storage    Specifies the storage provider that should be used
                    FileStorage    - Use FileStorage for uploaded assets
                    BlobStorage    - Use Azure BlobStorage for uploaded assets
                Default: FileStorage
If you prefer using a GUI, the templates are also registered with Visual Studio, allowing you to create an instance there:
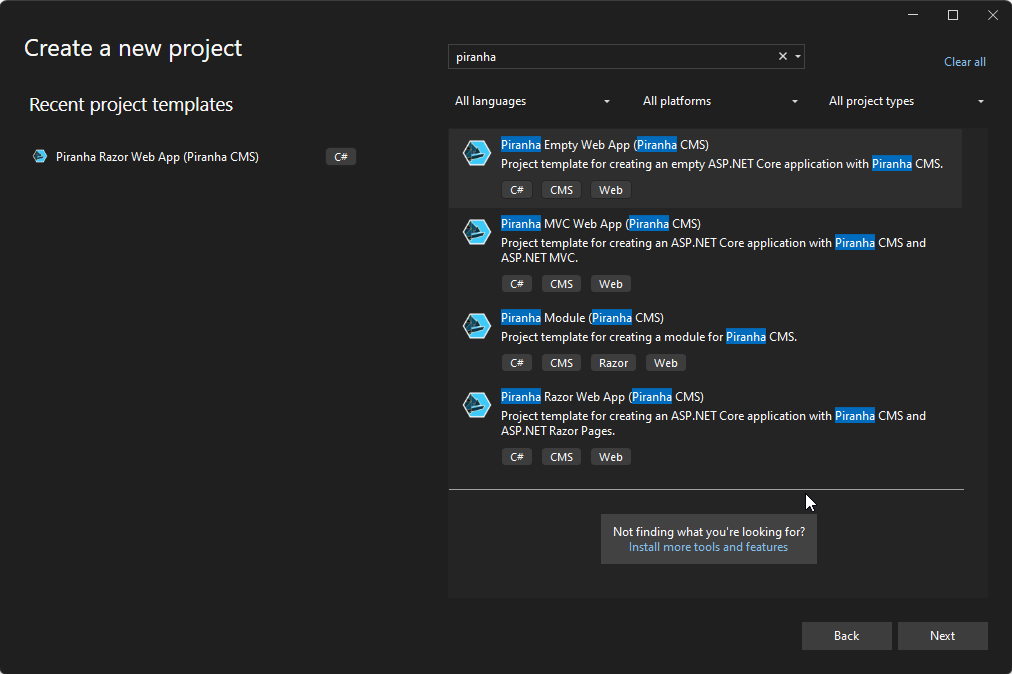
The nice thing about this option is it shows a dialog prompting you to choose the db and storage options:

The quickest options to get started would be to select SQLite and FileStorage, since these will setup a local file for the content and also store any the uploaded media to folder local to the application.
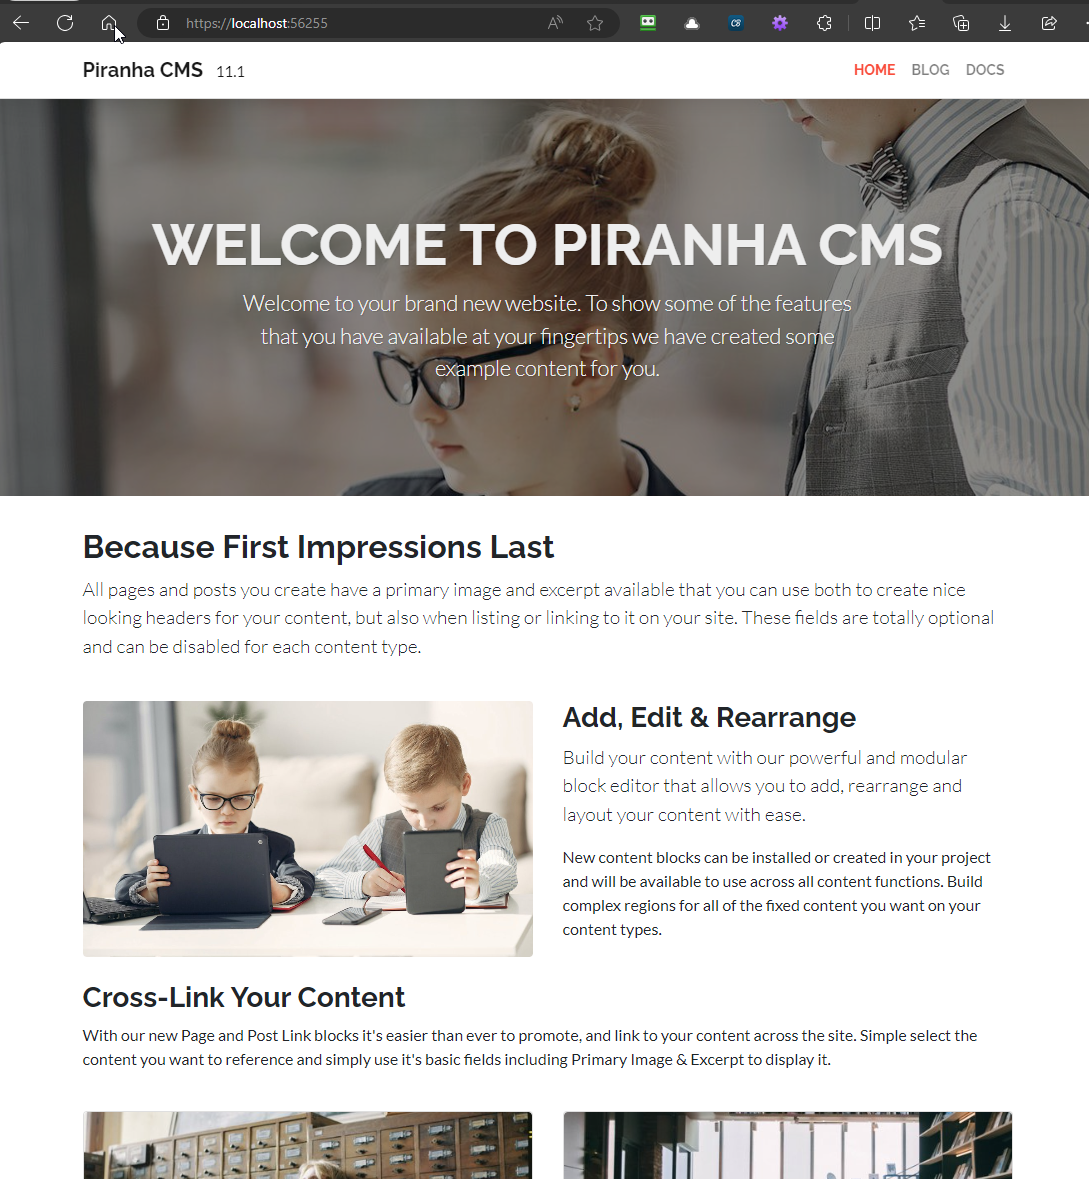
Once the project is created, simply launch the website in Visual Studio (or dotnet restore then dotnet run with the CLI) and you're off to the races!
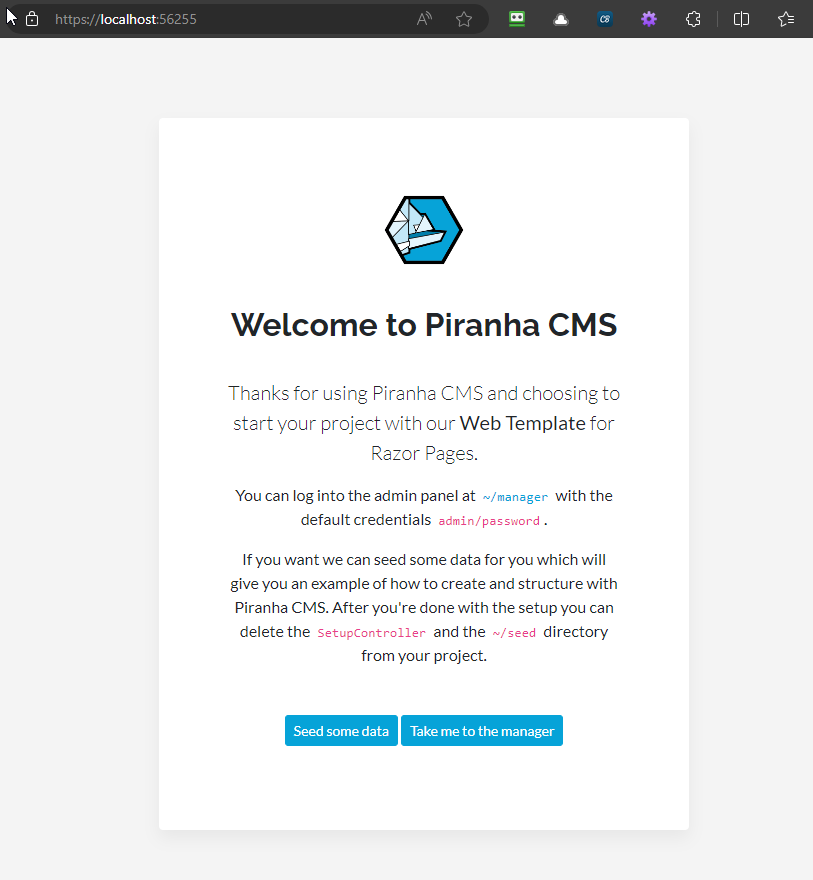
Another helpful feature of these templates is the option to add sample data to your project; this is helpful for understanding exactly how the data model works, so I do recommend you try this out to make it easier to get started!
Once this is done (or if you decide you don't want to use it) be sure to delete the Setup controller to prevent this from running on your finished site!
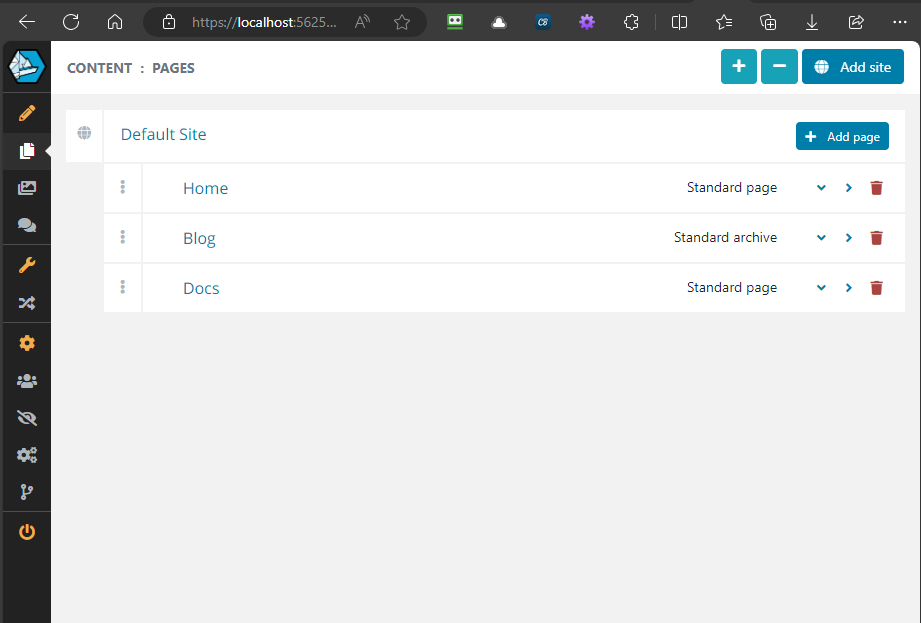
The manager is accessible from the path /manager with a default login and password of admin / password (be sure to change this!). All of the site content, including pages, posts, media, users, roles and even multiple sites are managed here.
Editing Content: Pages, Posts, Archives, and Blocks
Piranha CMS has three primary container models for managing content: Pages, Posts and Archives. These are the top-level objects that you create to support the content reachable by a url on your site (such as a home page, the blog post list page, or a single blog post details page). The content of each page, post, or archive, is then defined in one or more Blocks you add to the container.
Pages
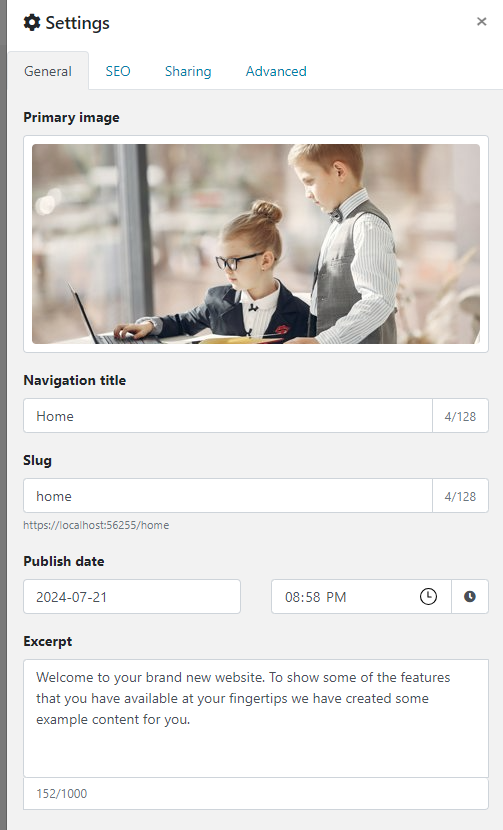
Although Pages, Posts, and Archives are similar, Pages are specifically just a page of content that is reachable by a url. The slug for that url is customizable, but is usually generated from the title of the page. Other page-level properties include publish date, excerpt, and a featured image, as well as some SEO properties like meta and open graph tags.
Remember, however, that pages are just the containers that represent the structure of the site. The actual content of the pages is delegated to blocks.
Blocks
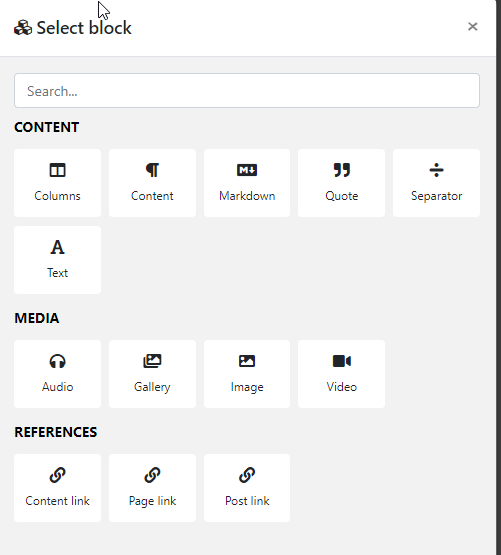
Blocks represent the actual components (text, images, markdown, etc.) that make up the contents of the pages you create. That is, each page or post is a container for one or more blocks of content that combine to make the page or post that the user sees.
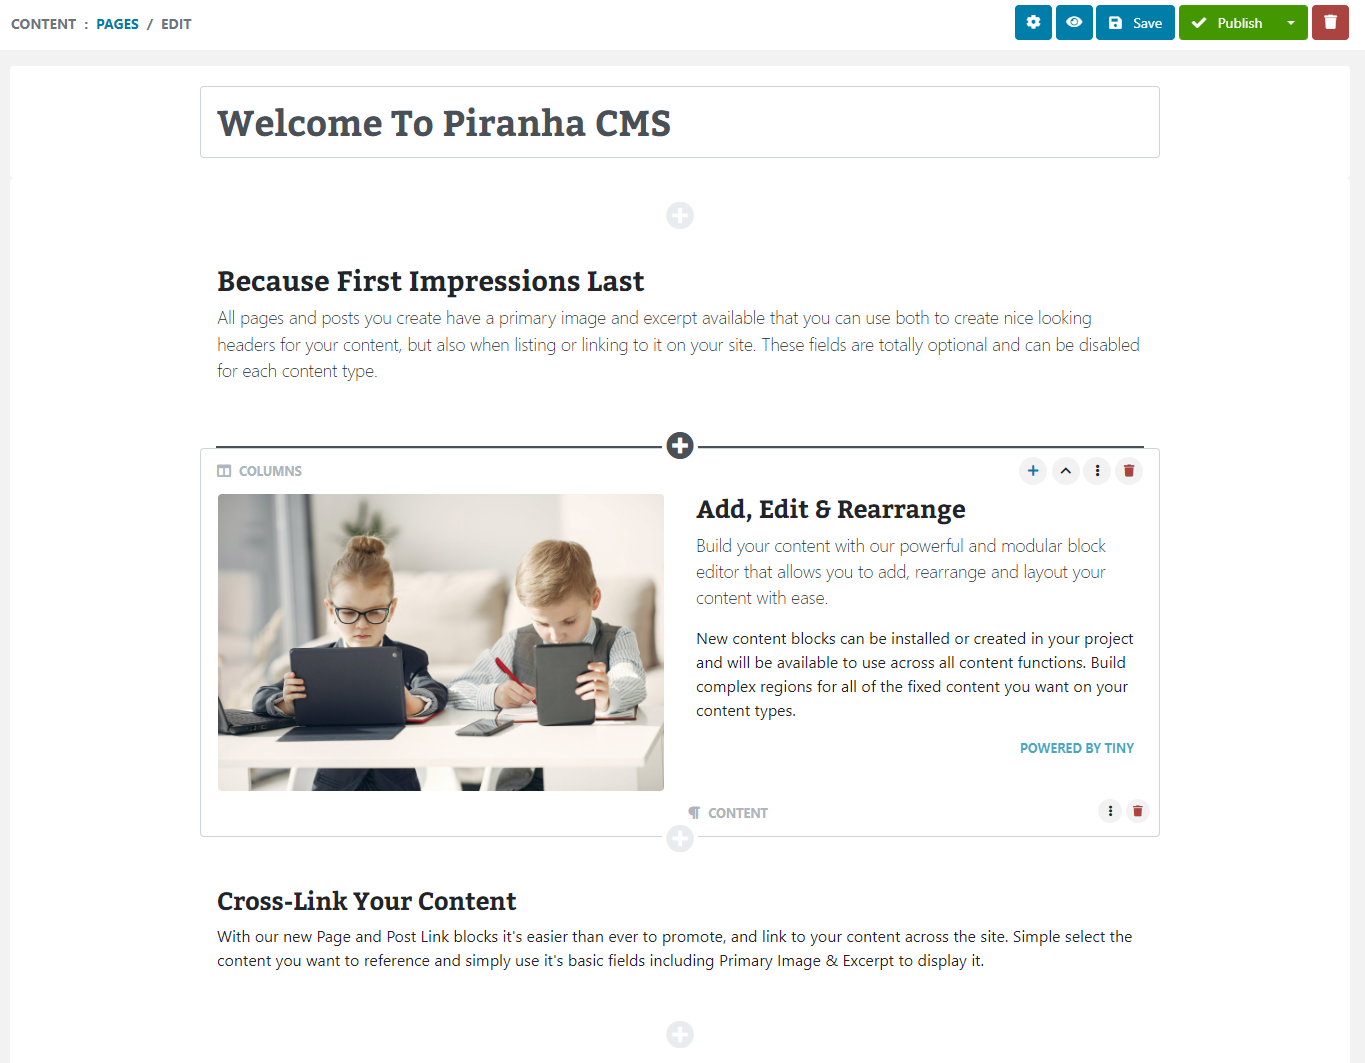
Piranha has a number of helpful blocks already built-in, but as we'll see in a future post, it's quite simple to make your own. And it's all drag and drop!
Post
A post is structurally similar to a page, in that it has the same properties like slug, title, excerpt, etc. It also serves as a container for blocks that make up the contents of the post.
The difference is that Posts are designed to represent a list of similar types of content (such as blog posts or news items), rather than just an unstructured page. Posts also have additional taxonomy properties for Category and Tag to further classify the posts.
Another key difference between posts and pages is that while Pages can be created as a stand-alone object anywhere in the tree, Posts are specifically designed to be added via an Archive page.
Archive
An Archive is a special type of page that is specifically designed to host any number of Posts. You can think of this as analogous to the concept of Blog and Blog Posts, where the Blog list page (that shows both all of the associated posts or any one single details view of a post) is the Piranha Archive type, and the individual Blog Posts are the Piranha Post type.
So if you wanted to create a Blog in Piranha CMS, you would first create the Archive page, then open that archive page in the manager and toggle to the Archive section, allowing you to create any number of Posts beneath it by clicking the Add button:
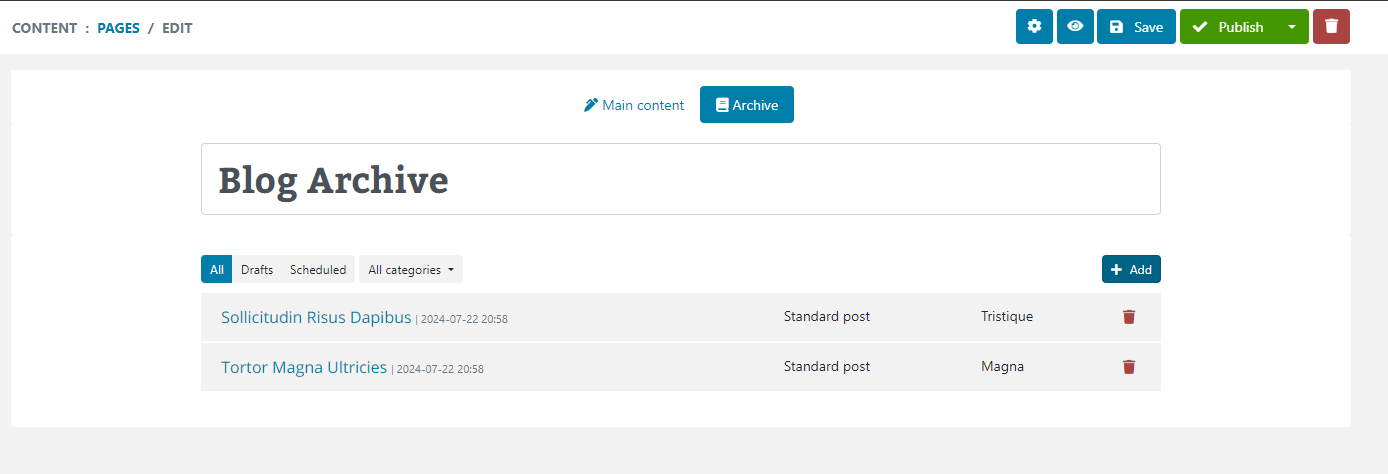
If this sounds confusing or unnecessarily complicated, we'll see in a future post exactly how powerful this setup really is, so stay tuned!
In the meantime, in summary, with Piranha, you can create any number of Pages, as well as any number of Posts by adding them to an Archive Page. From there, you can add whatever content you want to the page or post using blocks.
Now that you have an understanding of the basics of authoring content in Piranha, let's take a quick look at how this is rendered to the user.
Rendering Content in Piranha CMS
Just as Piranha spins up the three example models in the project template, the project also includes three corresponding Razor Pages, one for each of the three supported types, Page, Post, and Archive:
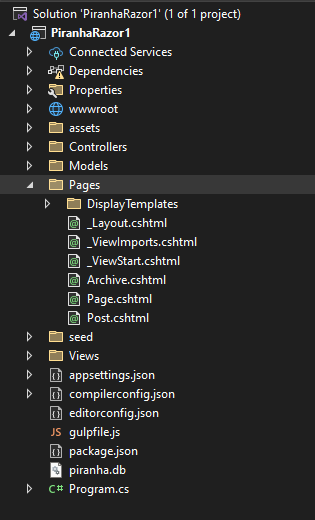
Each Razor Page also has its model type set to match the expected matching custom type (SinglePage for the StandardPage, SinglePostWithComments for the StandardPost, and ArchivePage for the StandardArchive by default).
For example, here is the markup of the Page.cshtml and you can see the model SinglePage<StandardPage>, as well as the markup rendering the full contents of the page from both the Page level properties, and the list of blocks defined for it.
@page
@model SinglePage<StandardPage>
@{
    ViewData["Title"] = !string.IsNullOrEmpty(Model.Data.MetaTitle) ? Model.Data.MetaTitle : Model.Data.Title;
    var hasImage = Model.Data.PrimaryImage.HasValue;
}
@section head {
    @WebApp.MetaTags(Model.Data)
}

<header @(hasImage ? "class=has-image" : "") @(hasImage ? $"style=background-image:url({ @Url.Content(WebApp.Media.ResizeImage(Model.Data.PrimaryImage, 1920, 400)) })" : "")>
    <div class="dimmer"></div>
    <div class="container text-center">
        <h1>@Model.Data.Title</h1>
        @if (!string.IsNullOrWhiteSpace(Model.Data.Excerpt))
        {
            <div class="row justify-content-center">
                <div class="col-lg-8 lead">
                    @Html.Raw(Model.Data.Excerpt)
                </div>
            </div>
        }
    </div>
</header>

<main>
    @foreach (var block in Model.Data.Blocks)
    {
        <div class="block @block.CssName()">
            <div class="container">
                @Html.DisplayFor(m => block, block.GetType().Name)
            </div>
        </div>
    }
</main>
The default Archive page is similar but in addition to looping through the Blocks for its content, it also loops through the associated Posts that were created for it, as well as adding support for paging and filtering.
@page
@model ArchivePage<StandardArchive, Piranha.Models.PostInfo>
@{
ViewData["Title"] = !string.IsNullOrEmpty(Model.Data.MetaTitle) ? Model.Data.MetaTitle : Model.Data.Title;
var hasImage = Model.Data.PrimaryImage.HasValue;
var posts = Model.Archive.Posts.Count;
Func<string> BlogLink = () => {
return Model.Data.Permalink
+ (Model.Archive.Category != null ? $"/category/{Model.Archive.Category.Slug}" : "")
+ (Model.Archive.Year.HasValue ? $"/{Model.Archive.Year}" : "" )
+ (Model.Archive.Month.HasValue ? $"/{Model.Archive.Month}" : "");
};
}
@section head {
@WebApp.MetaTags(Model.Data)
}
<header @(hasImage ? "class=has-image" : "") @(hasImage ? $"style=background-image:url({ @Url.Content(WebApp.Media.ResizeImage(Model.Data.PrimaryImage, 1920, 400)) })" : "")>
<div class="dimmer"></div>
<div class="container text-center">
<h1>@Model.Data.Title</h1>
@if (!string.IsNullOrWhiteSpace(Model.Data.Excerpt))
{
<div class="row justify-content-center">
<div class="col-lg-8 lead">
@Html.Raw(Model.Data.Excerpt)
</div>
</div>
}
</div>
</header>
<main class="archive">
@foreach (var block in Model.Data.Blocks)
{
<div class="block @block.CssName()">
<div class="container">
@Html.DisplayFor(m => block, block.GetType().Name)
</div>
</div>
}
<div class="container">
@for (var n = 0; n < posts; n += 2)
{
<div class="row">
@for (var i = n; i < Math.Min(posts, n + 2); i++)
{
var post = Model.Archive.Posts[i];
<div class="@(i == 0 ? "col-md-12" : "col-md-6")">
<article>
<header>
@if (post.PrimaryImage.HasValue)
{
<a href="@post.Permalink">
<img class="rounded mb-3" src="@Url.Content(WebApp.Media.ResizeImage(post.PrimaryImage, 1140, 450))" alt="@post.PrimaryImage.Media.AltText">
</a>
}
<h3>@post.Title</h3>
<p class="post-meta">
<span>
In <a href="@Model.Data.Permalink/category/@post.Category.Slug">@post.Category.Title</a>
</span>
<span>
Tags
@foreach (var tag in post.Tags)
{
<a href="@Model.Data.Permalink/tag/@tag.Slug">#@tag.Slug</a>
}
</span>
@if (post.IsPublished)
{
<span>
Published @post.Published.Value.ToShortDateString()
</span>
}
@if (post.EnableComments && post.CommentCount > 0)
{
<span>
<a href="@post.Permalink#comments">@post.CommentCount @(post.CommentCount == 1 ? "comment" : "comments")</a>
</span>
}
</p>
<p>@Html.Raw(post.Excerpt)</p>
<a href="@post.Permalink" class="btn btn-primary">Read more</a>
</header>
</article>
</div>
@if (i == 0)
{
n--;
break;
}
}
</div>
}
@if (Model.Archive.TotalPages > 1) {
<div class="row">
<div class="col-sm">
<nav aria-label="Page navigation example">
<ul class="pagination justify-content-center">
<li class="page-item">
<a class="page-link" href="@BlogLink()/page/1">
<span aria-hidden="true">«</span>
<span class="sr-only">Previous</span>
</a>
</li>
<li class="page-item">
<a class="page-link" href="@BlogLink()/page/@Math.Max(1, Model.Archive.CurrentPage - 1)">
<span aria-hidden="true">‹</span>
<span class="sr-only">Previous</span>
</a>
</li>
@for (var n = 1; n <= Model.Archive.TotalPages; n++) {
<li class="page-item @(Model.Archive.CurrentPage == n ? "active" : "")"><a class="page-link" href="@BlogLink()/page/@n">@n</a></li>
}
<li class="page-item">
<a class="page-link" href="@BlogLink()/page/@Math.Min(Model.Archive.TotalPages, Model.Archive.CurrentPage + 1)">
<span aria-hidden="true">›</span>
<span class="sr-only">Next</span>
</a>
</li>
<li class="page-item">
<a class="page-link" href="@BlogLink()/page/@Model.Archive.TotalPages">
<span aria-hidden="true">»</span>
<span class="sr-only">Next</span>
</a>
</li>
</ul>
</nav>
</div>
</div>
}
</div>
</main>
Likewise, the Post.cshtml does the same loop through all the Blocks before adding a section to accept and show comments (which is also a native feature of Piranha!):
@page
@model SinglePostWithComments<StandardPost>
@{
    ViewData["Title"] = !string.IsNullOrEmpty(Model.Data.MetaTitle) ? Model.Data.MetaTitle : Model.Data.Title;
    var hasImage = Model.Data.PrimaryImage.HasValue;
    var archive = await WebApp.Api.Pages.GetByIdAsync(Model.Data.BlogId);
}
@section head {
    @WebApp.MetaTags(Model.Data)
}

<header @(hasImage ? "class=has-image" : "") @(hasImage ? $"style=background-image:url({ @Url.Content(WebApp.Media.ResizeImage(Model.Data.PrimaryImage, 1920, 400)) })" : "")>
    <div class="dimmer"></div>
    <div class="container text-center">
        <h1>@Model.Data.Title</h1>
        <p class="post-meta">
            <span>
                In <a href="@archive.Permalink/category/@Model.Data.Category.Slug">@Model.Data.Category.Title</a>
            </span>
            <span>
                Tags
                @foreach (var tag in Model.Data.Tags)
                {
                    <a href="@archive.Permalink/tag/@tag.Slug">#@tag.Slug</a>
                }
            </span>
            @if (Model.Data.IsPublished)
            {
                <span>
                    Published @Model.Data.Published.Value.ToShortDateString()
                </span>
            }
            @if (Model.Data.EnableComments && Model.Data.CommentCount > 0)
            {
                <span>
                    <a href="#comments">@Model.Data.CommentCount @(Model.Data.CommentCount == 1 ? "comment" : "comments")</a>
                </span>
            }
        </p>
        @if (!string.IsNullOrWhiteSpace(Model.Data.Excerpt))
        {
            <div class="row justify-content-center">
                <div class="col-lg-8 lead">
                    @Html.Raw(Model.Data.Excerpt)
                </div>
            </div>
        }
    </div>
</header>

<main>
    @foreach (var block in Model.Data.Blocks)
    {
        <div class="block @block.CssName()">
            <div class="container">
                @Html.DisplayFor(m => block, block.GetType().Name)
            </div>
        </div>
    }
    @if (Model.Data.EnableComments)
    {
        <div id="comments" class="container comments">
            @if (Model.Data.IsCommentsOpen)
            {
                <div class="alert alert-comment mt-2 mb-5">
                    <form asp-page-handler="SaveComment" method="post">
                        @Html.AntiForgeryToken()
                        @Html.Hidden("Id", Model.Data.Id)

                        <h3 class="mb-3">Leave a comment</h3>
                        <p class="mb-4">
                            Please note that we won't show your email to others, or use it for sending
                            unwanted emails. We will only use it to render your Gravatar image and to
                            validate you as a real person.
                        </p>
                        <div class="row">
                            <div class="col-md-6">
                                <div class="form-group">
                                    <input name="CommentAuthor" type="text" class="form-control" placeholder="Your name">
                                </div>
                            </div>
                            <div class="col-md-6">
                                <input name="CommentEmail" type="text" class="form-control" placeholder="Your email address">
                            </div>
                        </div>
                        <div class="form-group">
                            <input name="CommentUrl" type="text" class="form-control" placeholder="An (optional) URL to your website">
                        </div>
                        <div class="form-group">
                            <textarea name="CommentBody" rows="6" class="form-control" placeholder="Your awesome comment"></textarea>
                        </div>
                        <div class="form-group text-left">
                            <button class="btn btn-success">Post Comment</button>
                        </div>
                    </form>
                </div>
            }
            @Html.DisplayFor(m => m.Comments)
        </div>
    }
</main>
The magic of the Block rendering happens thanks to the Display Templates, which leverages the standard asp.net framework DisplayFor pattern to easily render any type of block you want. For example, rendering the Image Gallery is as easy as looping through its backing model to create a carousel:
@model Piranha.Extend.Blocks.ImageGalleryBlock
@using Piranha.Extend.Blocks
@{
    var unique = "gallery-" + Guid.NewGuid().ToString();
    var images = Model.Items
        .Where(i => i.GetType() == typeof(ImageBlock) && ((ImageBlock)i).Body.HasValue)
        .ToList();
}

<div id="@unique" class="carousel slide gallery-block" data-ride="carousel">
    <ol class="carousel-indicators">
        @for (var n = 0; n < images.Count; n++)
        {
            <li data-target="#@unique" data-slide-to="@n" class="@(n == 0 ? "active" : "")"></li>
        }
    </ol>
    <div class="carousel-inner">
        @foreach (var item in images)
        {
            <div class="carousel-item @(item == images.First() ? "active" : "")">
                <img src="@Url.Content(WebApp.Media.ResizeImage(((ImageBlock)item).Body.Media, 1100, 450))" class="d-block w-100">
            </div>
        }
    </div>
    <a class="carousel-control-prev" href="#@unique" role="button" data-slide="prev">
        <span class="carousel-control-prev-icon" aria-hidden="true"></span>
        <span class="sr-only">Previous</span>
    </a>
    <a class="carousel-control-next" href="#@unique" role="button" data-slide="next">
        <span class="carousel-control-next-icon" aria-hidden="true"></span>
        <span class="sr-only">Next</span>
    </a>
</div>
You could easily replace this with custom html for a different gallery and render it any way you want! Plus we'll see in a future post how this makes it a snap to add your own custom blocks, including a custom editor for the backend.
Routing in Piranha CMS
By convention, Piranha internally routes each url/slug request to these exact internal routes (/page /post and /archive) to correspond to these defined physical Razor Page cshtml files. It translates the slug to an appropriate page, post, or archive, and renders the contents of that model using the appropriately routed Razor Page file. This allows each single razor file to render any number of page, posts, and archives using different slugs!
Another convention is that the cshtml files also expect that the model types for each are correctly mapped, or the result will be a 404. That means you can't, for example, put the model for the Page.cshtml as SimplePage<StandardPost> because it's supposed to be SimplePage<StandardPage>.
Of course, it is possible to both override and extend this routing to support multiple page, post, and archive types, and we'll explore both why and how you would do this in a future post, so stay tuned!
And that's the gist of Piranha! But we're only just getting started!
Wrapping Up and Next Steps
In this post we setup a sample Piranha CMS project using the helper templates provided by the platform. As we saw, Piranha mainly consists of three main containers: Pages, Posts, and Archives, each of which can then be made up of one or more Blocks to hold the content of the page shown to the user. This makes for an easy, intuitive, drag-and-drop experience for managing content on your site.
We also saw how Piranha truly leverages the asp.net core framework to render your content, including following conventions around routing and display templates to make it easy to customize how your site is rendered!
Hopefully you're starting to see just how simple, yet powerful PiranhaCMS can be, and if you're not convinced, stay tuned because there's much more to come!

In our next post, we'll take a closer look at the models used by Piranha that back these content types, and how you can extend them with custom properties and more!
Until then, as always thanks for reading and I hope this was helpful!