When using Sitefinity's Ecommerce features, you may want to restrict the quantity of items to a specific minimum or range. This allows you to do something like offer "Bundle" pricing for purchasing multiple items, while restricting the actual purchase of those items to the minimum quantity.
The Sitefinity Ecommerce order widget templates (available in the Sitefinity SDK) already include validation to ensure a quantity between 0 and 9999. In this article, we'll look at how you can use this to set a custom minimum and maximum quantity using a combination of custom fields and external templates.
Custom Fields
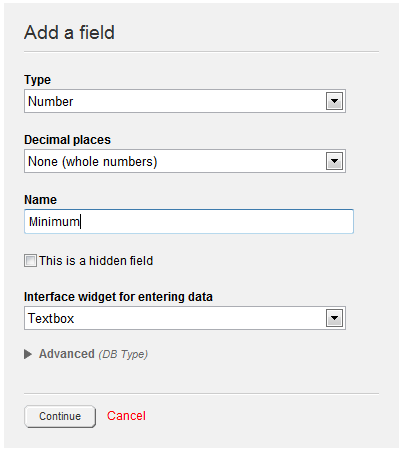
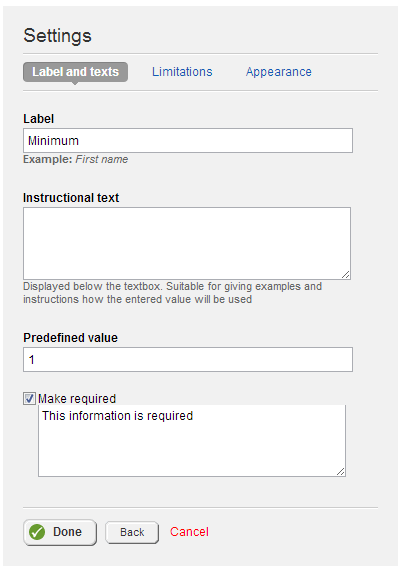
Every content item in Sitefinity supports the addition of custom fields to extend its properties. The first thing you want to do is add two number fields to a product to hold the minimum and maximum values.
Optionally, you could use this opportunity to make the minimum value required with a default value of 1 for good measure.
Keep in mind that custom fields apply globally to the content item. However, in Ecommerce, these apply only to the specific product type. That means if you want to apply these min/max values accross all your products, you need to make sure that you add these fields to each of the product types you're using (such as Book, Song, etc.).
We'll look at how to handle enforcing this to only some products later in this article.
Map Widgets to External Templates
The next step is to create external template for the AddToCart widget template, which is the control that displays the quantity and add to cart button.
Rather than simply copying the template into your Sitefinity project, what you want to do instead is create a new UserControl (.ascx) and copy the content of the external template into the frontend part of the control.
The reason for doing this is that we need the code-behind of a full UserControl in order to run code to modify the validation controls. Fortunately, when we map a Sitefinity widget to an external template that is a full UserControl, the code-behind gets executed along with it!
Add-to-Cart Widget Template
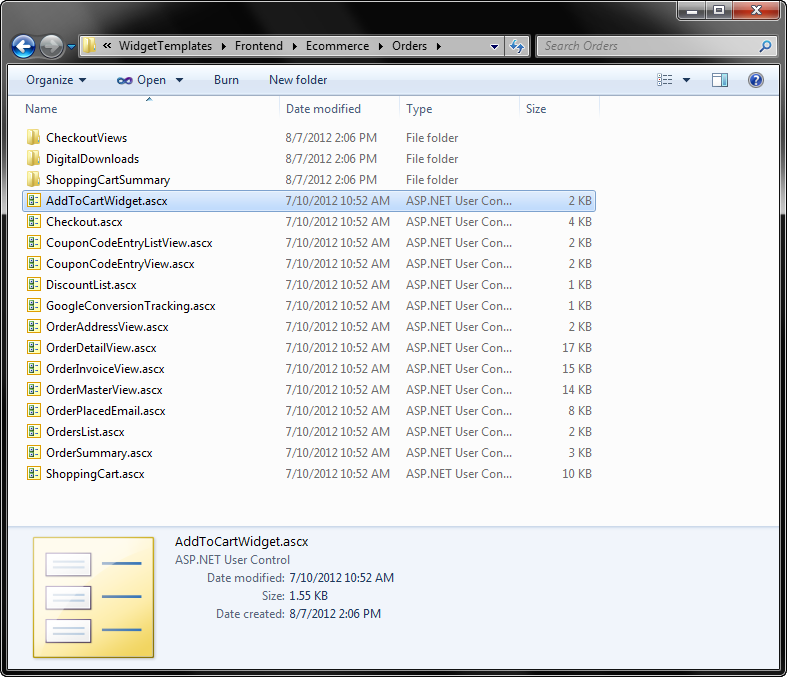
This template (as well as all other widget templates) is available by installing the Sitefinity SDK and extracting them from the \Program Files\Telerik\Sitefinity\SDK\Content\Resources folder. The AddToCart widget will be in the Frontent\Ecommerce\Orders folder.
Here is the frontend for our custom template.
<%@ Control Language="C#" AutoEventWireup="true" CodeBehind="AddToCartWidget.ascx.cs" Inherits="SitefinityWebApp.Templates.AddToCartWidget" %>
<%@ Register TagPrefix="sf" Namespace="Telerik.Sitefinity.Web.UI" Assembly="Telerik.Sitefinity" %>
<asp:UpdatePanel ID="UpdatePanel" runat="server">
	<ContentTemplate>
		<sf:Message runat="server" ID="addedToCartMessage" CssClass="sfMessage sfTopMsg"
			RemoveAfter="10000" />
	</ContentTemplate>
</asp:UpdatePanel>
<asp:Label ID="quantityLabel" runat="server" Text='<%$Resources:OrdersResources, QuantityColon %>'
	AssociatedControlID="quantity" CssClass="sfTxtLbl" />
<asp:RequiredFieldValidator ID="quantityRequiredFieldValidator" runat="server" ControlToValidate="quantity"
	ValidationGroup="addToCart" Display="Dynamic" CssClass="sfErrorWrp">
	<span class="sfError">
		<asp:Literal runat="server" ID="lProductQuantityIsRequired" Text="<%$Resources:OrdersResources, ProductQuantityIsRequired %>" /></span>
</asp:RequiredFieldValidator>
<asp:RangeValidator ID="quantityValidator" runat="server" MinimumValue="1" MaximumValue="9999"
	ControlToValidate="quantity" ValidationGroup="addToCart" Type="Integer" Display="Dynamic"
	CssClass="sfErrorWrp">
	<span class="sfError">Invalid Quantity</span>
</asp:RangeValidator>
<asp:TextBox ID="quantity" runat="server" CssClass="sfTxt sfQuantity" />
<asp:Button ID="addToCartButton" runat="server" Text='<%$Resources:OrdersResources, AddToCart %>'
	ValidationGroup="addToCart" CssClass="sfAddToCartBtn" />
Code-Behind and Handling Different Product Types
In order to modify the validation control, we need to get an instance of the product currently being displayed. The easiest way to do this is by using the built-in GetUrlParameterString which is an extension method offered by Sitefinity to retrieve a content's url parameter through code.
Then we simply need to use the CatalogManager to retrieve the product and its custom fields, which we'll use to populate the validation control already on the widget template.
However, as mentioned before, custom fields in Ecommerce products are only applied to specific types. This means if you attempt to use GetValue("Minimum") on a product that does not have such a field, you will get an null reference exception.
Fortunately, we can simply determine that we are working with the correct type before continuing, as shown in the code sample below. Although there are methods exposed by the CatalogManager to determine the full type, I've found the easiest way is to simply use the standard GetType() method, which includes the dynamic type generated when you create the Ecommerce product type.
So now, here is the full code-behind for the control:
public partial class AddToCartWidget : System.Web.UI.UserControl
{
	protected void Page_Load(object sender, EventArgs e)
	{
                // only setup on first load
                if (IsPostBack) return;

		// Get the product url parameter
		var itemUrl = this.GetUrlParameterString(true);
		string redirectUrl = "";

		// Get the product from the Catalog
		var manager = CatalogManager.GetManager();
		var product = manager.GetItemFromUrl(typeof(Product), itemUrl, out redirectUrl) as Product;
		if (product == null) return;

		// ensure type matches expected
		var type = product.GetType().Name;
		if (!type.Contains("generalproduct")) return;

		// get min/max values and bind to validation
		var min = product.GetValue<decimal>("Minimum");
		var max = product.GetValue<decimal>("Maximum");
		quantityValidator.MinimumValue = min.ToString();
		quantityValidator.MaximumValue = max.ToString();

		// set input value to match minimum
		quantity.Text = min.ToString();
	}
}
ViewMap
The last step is to tell Sitefinity to map the AddToCart widget to our custom template. There are two ways to do this. You can certainly go into the ProductDetailsView widget template (which contains the AddToCart widget) and add the path to your template to the LayoutTemplatePath property. However this requires you to edit the widget templates on the server (or with Thunder).
Alternatively you can map the ProductDetailsView template itself to an external one and set the value there, but this too involves additional mapping and modifications.
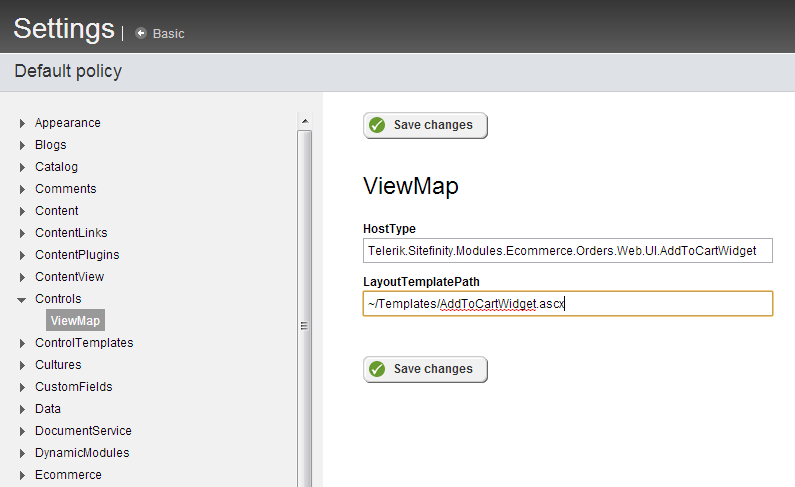
Instead we'll take advantage of Sitefinity's ViewMap configuration, which allows you to globally map a control to an external template. Simply create a new entry, using the HostType of Telerik.Sitefinity.Modules.Ecommerce.Orders.Web.UI.AddToCartWidget and your custom path for the LayoutTemplatePath.
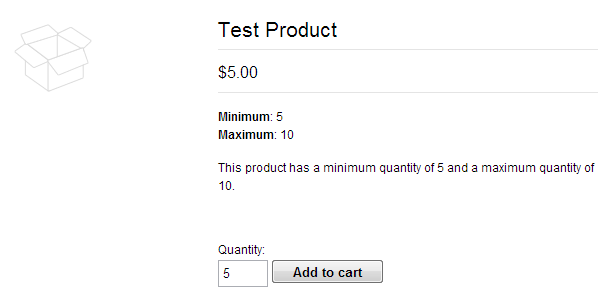
Restart your application and load the product page for an item that has a minimum and maximum field. Notice here that we already have evidence of our control working, as the minimum value has been used to prepopulate the quantity field.
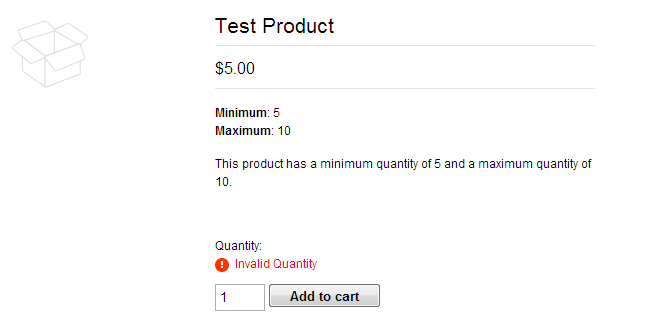
If I attempt to add the item to the cart, the validation kicks in and alerts me of the error.
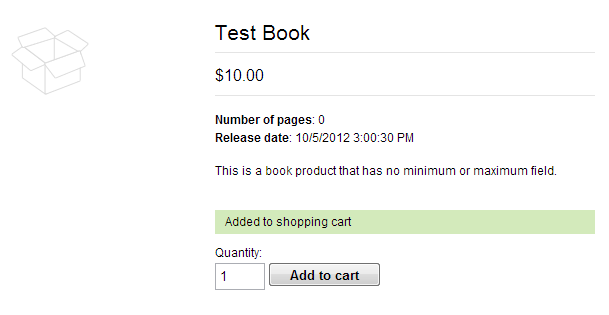
However, if I choose a product without a minimum or maximum field, the product type-check we performed allows the standard validation to execute, and I'm allowed to add it to my cart.
Wrapping Up
Using full UserControls for your external templates gives you control over more than simply the layout. Because the full code-behind is executed, you can take full control over the behavior and execution of the control, opening up a wide range of possibilities and customization.
What custom behavior have you been able to achieve with external templates? Share your story in the comments!
P.S. If you're wondering how I modified the default text for the error message, be sure to see the previous post Modifying Sitefinity Interface Labels and Messages.
