Now that my site is updated and upgraded from Sitefinity 3 to 4, I thought I'd take a moment to talk about my experience, and hope that others might find it useful.
Design
The theme for this website is actually a template I purchased from ThemeForest, a fantastic resource for web and CMS templates. ThemeForest is part of Envato, which offers many different sites for different resources, including stock music, graphics, and in depth tutorials on a variety of subjects.
Most ThemeForest themes usually include a dedicated version for popular software such as Wordpress. However, because Sitefinity uses standard master pages, I instead only needed the basic html package (Metrosite is the theme I'm using). This has the advantage of being less expensive, plus allowed me to fully customize the theme and layout for my needs.
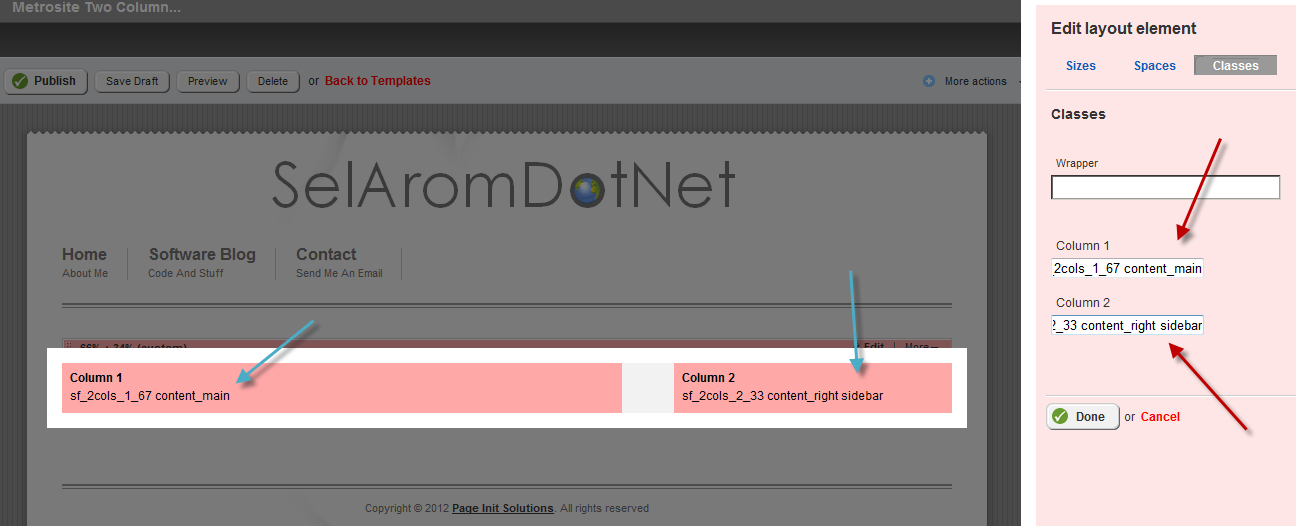
By using the new Custom Layout Editor I can create columns on the fly, while using the CSS classes that are already defined for such elements in the site theme.
From there it was just a matter of styling a few more things like widget templates and the design was complete. Couldn't be simpler thanks to Sitefinity's use of native ASP.NET elements like Master Pages and Themes.
Migration
Getting my old Sitefinity 3 content migrated to v4 was a breeze thanks to the handy Migration Guide and the new native Migration Module which is included in Sitefinity 4.
Remember that Sitefinity 4 is a completely new platform, so moving to Sitefinity 4 requires that you create a new blank project, then import content from Sitefinity 3.
The migration module took care of everything, including creating all the necessary templates, pages, libraries and content items (blog posts). It even preserved all my urls so I won't lose any of that delicious, delicious SEO.
New Url Format
Here's where things get interesting! Although the Sitefinity migration tool retains the original Urls for existing blog posts, new blog posts will fallback to the default format of /[blogurl]/[date]/[blogposturl]. This also happens to any existing blog posts that you republish.
This isn't necessarily a problem, because all of the original Urls are preserved and by default redirect to whatever the default Url is. However, I prefer to have a consistent naming, and don't want the blog urlname in my post links.
Custom Blog Data Provider to the Rescue
Fortunately, Sitefinity has always been about options. If something out-of-the-box isn't the way you want it, there's almost always a way to customize or replace it.
Simple content items like News and Events have a Url format property you can you can modify to change the Url format. However, complex modules like Blogs have parent-child relationships (Blogs and BlogPosts) and require an extra step.
It is the Blogs Data Provider that is responsible for both saving and retrieving an individual post's Url, and it is here that we need to override the Url format. Thankfully there is already a helpful blog post on doing exactly this: Custom URL Formats for Sitefinity Content Modules.
Using this as a guide, I was able to make a simple provider with a custom Url format. Because I had already migrated my posts into the default provider I didn't follow the suggested path of adding a second provider, but instead replaced the default one with my custom provider type.
