This is the second post in an ongoing series on posts about Apps for Office. Today we'll look at the requirements and tools needed to get started developing, as well as a "Hello, World!" example.
Prerequisites
To develop Apps for Office you need at least the following:
Visual Studio 2013 with Office Developer Tools for Visual Studio 2013 � March 2014 Update OR
Visual Studio 2012 with Office Developer Tools for Visual Studio 2012
You also of course need to have the Office 2013 application for which you are developing, such as Word, Excel, Outlook and PowerPoint, so that you can launch and test these apps from within Visual Studio. If you wish to deploy your apps internally, as opposed to the public App Store, you'll need to setup an app catalog in SharePoint. Users of Office 365 Small Business also have their own App Catalog included and can be used for deploying internal or test apps. Finally, because Apps for Office are ultimately web sites, you need to have a public web server to deploy the site so that it can serve the application to the Office client. Azure Web Sites is a great option for this as it includes SSL and can be deployed directly from Visual Studio. We'll review all of these deployment options in detail in a future post.
Creating an App for Office
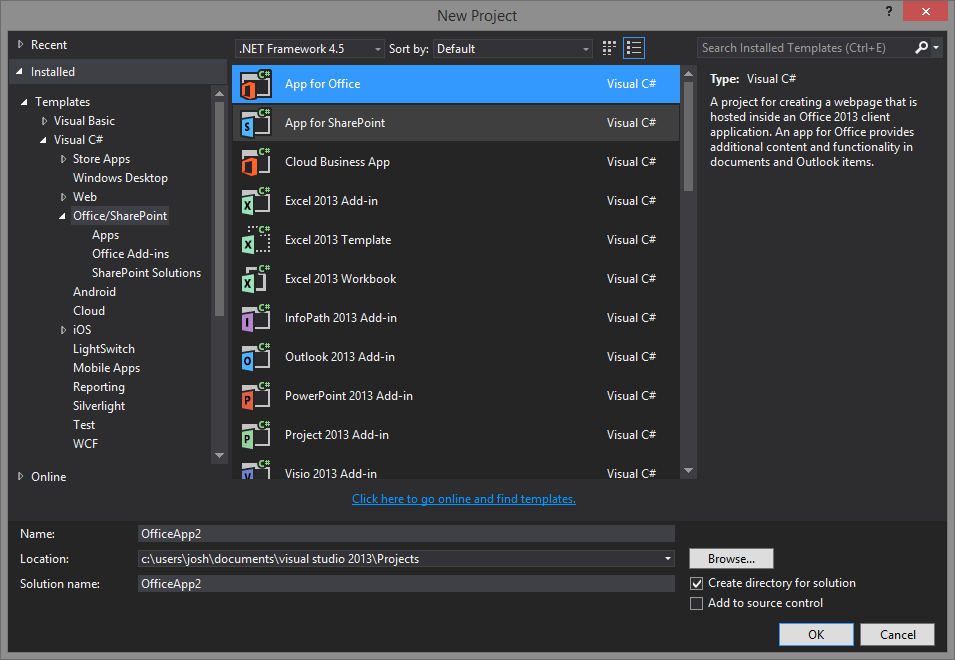
Once installed, the Office Developer Tools add the necessary templates to Visual Studio. Simply create a new project and select the desired option from the dialog:
The next step prompts you to choose one of the three supported App Types � Task Pane, Content, and Mail:
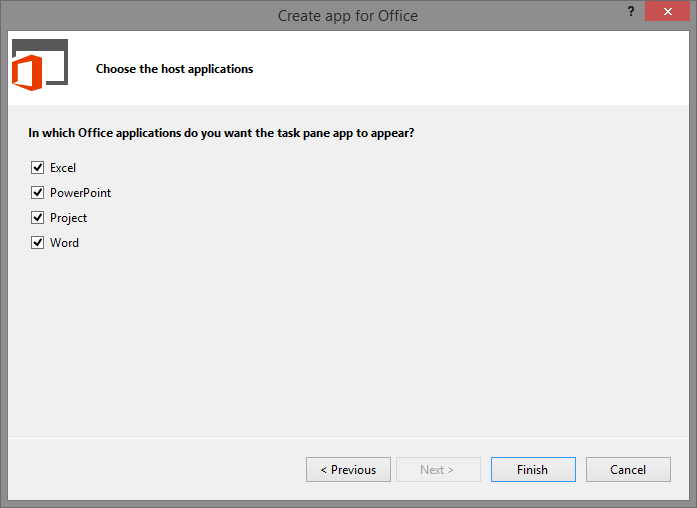
We looked at examples of all three apps in the Introduction to Apps for Office post, and for now we'll just go with the Task Pane, since it supports the most options. We'll enable them all so we can show how easy it is to switch between Office Apps, without having to change any code. Visual Studio presents the solution, which consists of the App for Office project, and the accompanying website project.
App for Office Project and Manifest
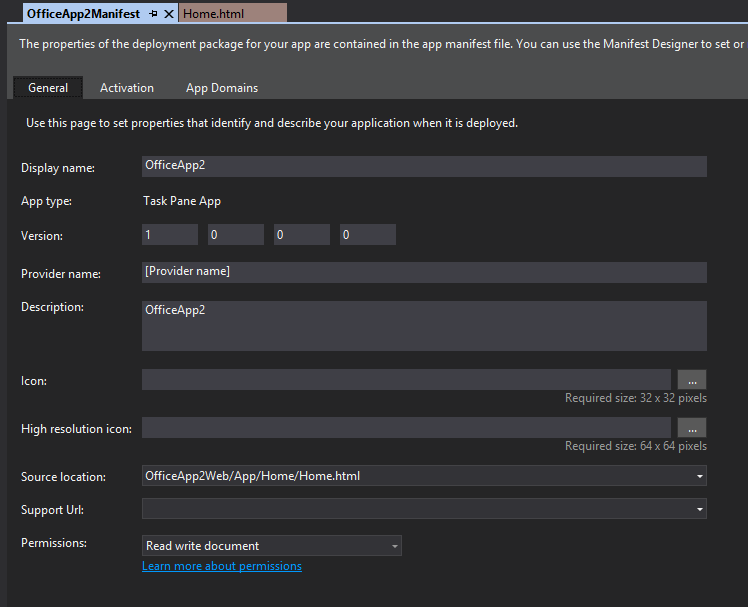
Double-clicking the Manifest item reveals the Manifest editor, where you can update the metadata for the app, including adding the description, app icon, and the starting URL to load from the website project when the app is launched.
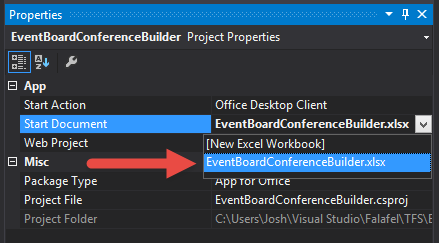
Selecting the project itself reveals the properties, where you can specify how the app should launch from Visual Studio. You can specify which Office application should launch, creating a new blank document each time.
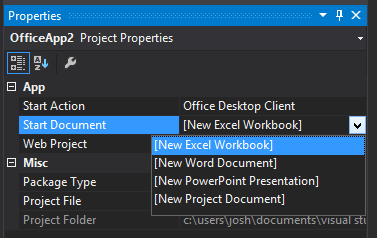
Alternatively, if your app requires that a specific document or template is open to run, you can add this file to the project, and specify it as the startup document instead of a blank one. This is what we have done for the EventBoard Conference Builder App, which requires a specific Excel template to run the app.
More technical information about the App for Office Manifest is available via MSDN: Understanding the apps for Office XML manifest.
App for Office Website
Visual Studio also creates a sample website project to get you started, which includes the JavaScript references to the Apps for Office API and jQuery, as well as a default Office StyleSheet to give your apps a familiar look that blends well with the accompanying document. The sample project is explored in detail on MSDN, but the three main components we need to be familiar with are:
html - This is the default page of your app, and represents the initial user interface presented to the user in Office when launched.
js - The JavaScript which defines the behavior and logic of the Home page of your app.
js - This JavaScript file also loads with the Home page, but should also be referenced in every page of your app as a location for common code and behavior global to the entire application.
Most of the behavior of the demo app happens in the Home.js file, and is triggered by a special method from the API: Office.initialize. This function lets your app know that Office has fully loaded it, and it is ready to begin execution. Any initialization code for your app should be placed here, including wiring up events. In the sample app, the click handler is setup via jQuery, but you could also easily execute a custom bind via Kendo UI or other framework instead. The App.js also registers a helpful notification window to present info to the users, which we�ll use later in our first app to handle errors.
Running the App
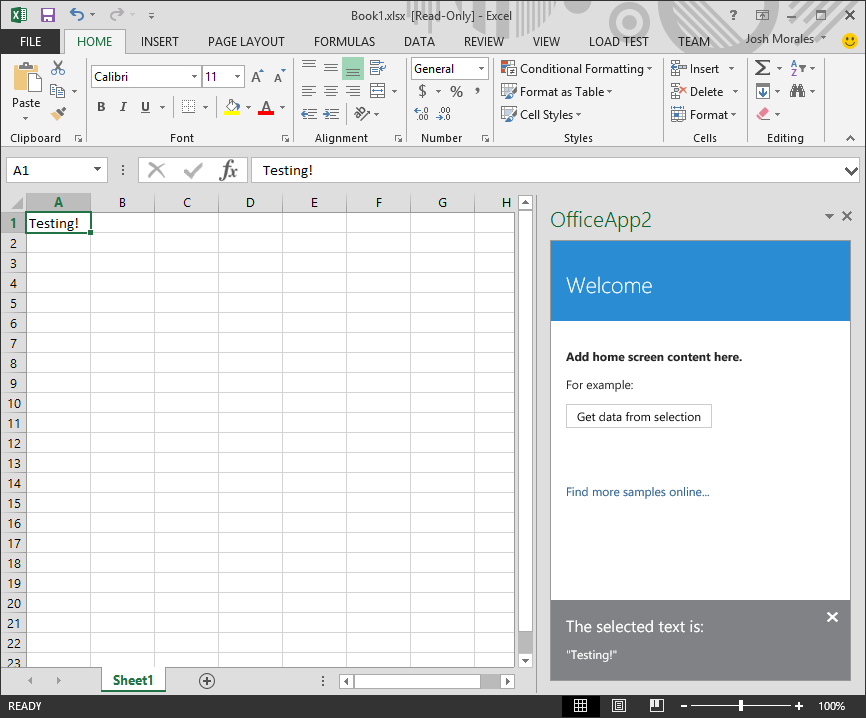
To launch your app, simply start the debugger (F5), and Visual Studio will launch the specified Office app, automatically installing and launching your app within the opened document (which in my case is Excel). The demo app simply echoes the currently selected text, and you can see here that we get the expected result.
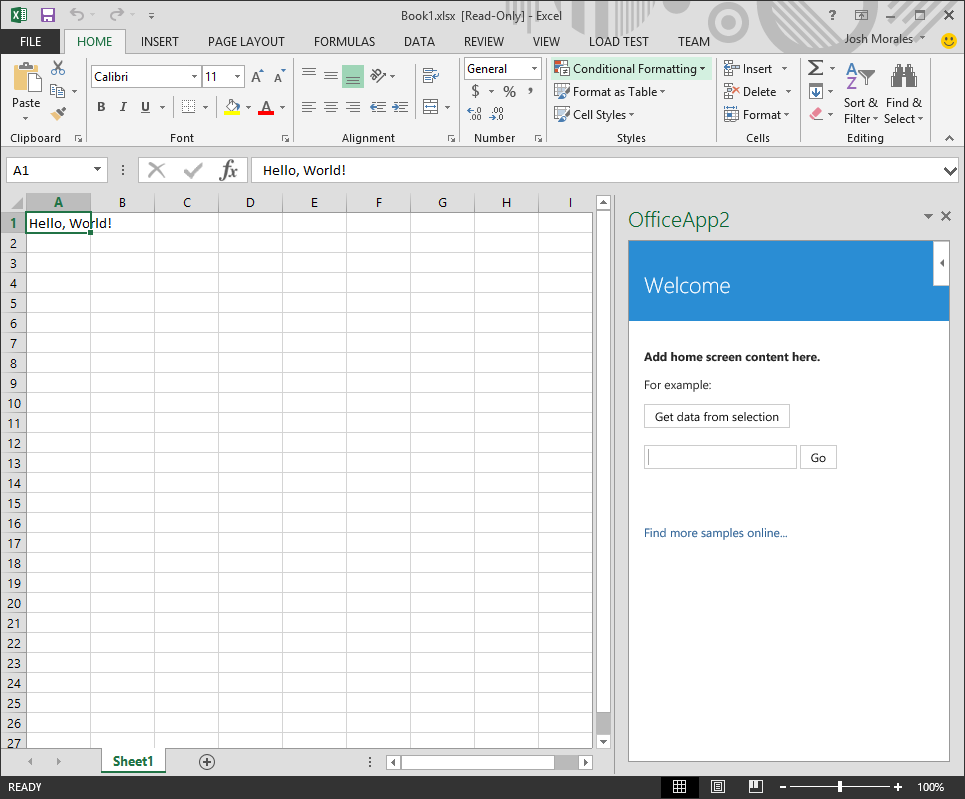
Now that we've seen the simple demo in action, let's add our own functionality to this app by adding a button which will use the Office JavaScript API to write a custom "Hello, World!" style message to the document.
Hello, World!
We begin by adding both an input text and button to the Home.html page to allow the user to enter their name:
<p>

��� <input id="name" type="text" />

��� <input id="say-hello" type="button" value="Go" />

</p>
Next, within the initialize function of the Home.js file, wire up an event handler:
Office.initialize = function (reason) {

������� $(document).ready(function () {

����������� app.initialize();

���������� $('#get-data-from-selection').click(getDataFromSelection);

���������� $('#say-hello').click(sayHello);

������� });

�� };

��� function sayHello() {

������� // implementation

��� }
� Finally, we need to use the API to write out text to the document. But before we do, there's one key factor of Apps for Office to note.
Office API: Asynchronous Programming
The Office API relies heavily on asynchronous functions to ensure that any interaction through your apps do not result in blocking the user experience. As a result, most of the functions you'll use when developing apps for Office execute asynchronously, accepting a callback function as a parameter. This parameter includes the result, status, and error (if any) of the API call so that you can attach additional behaviors such as validation or error recovery. The method we want for our current example is setSelectedDataAsync, which writes the contents of the parameter to the selected location in the document. Here's the sample code to complete the sayHello and callback function to complete the app:
function sayHello() {

������� var name = $('#name').val();

������� if (name === '') name = "World";

������� var message = "Hello, " + name + "!";

������� Office.context.document.setSelectedDataAsync(message, messageCallback);

��� }

��� function messageCallback(result) {

���� ���if (result.status === Office.AsyncResultStatus.Succeeded) {

����������� app.showNotification("Message sent successfully!", "Success");

������� } else {

����������� app.showNotification("Error sending message:", result.error.message);

������� }

��� }
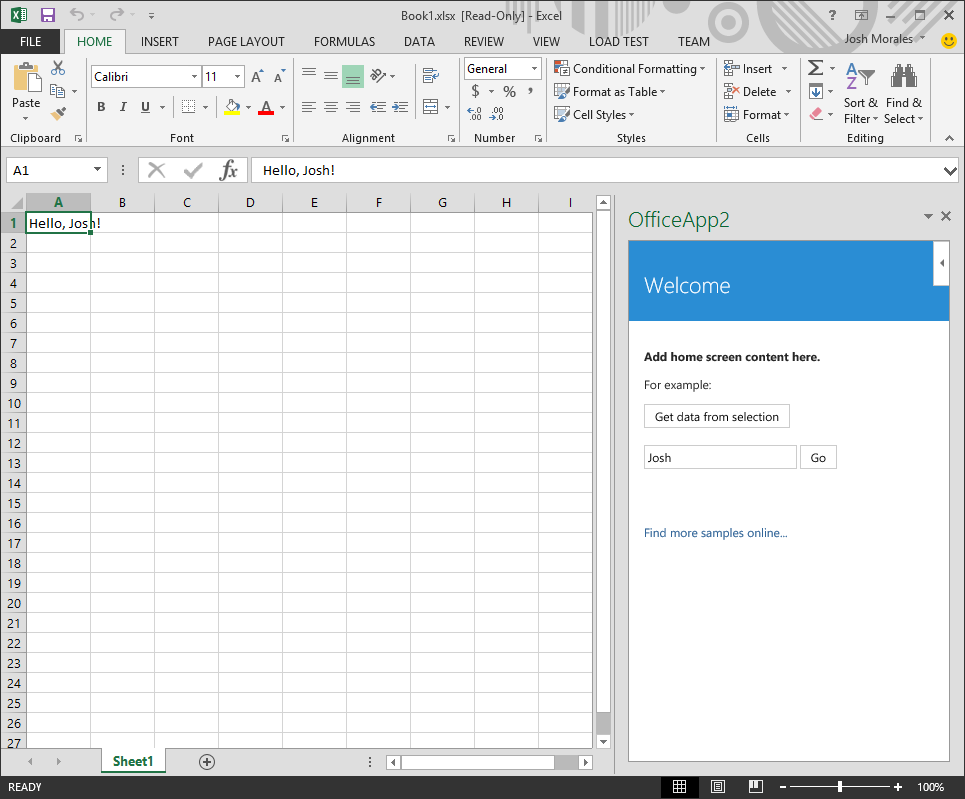
� Because this app is simply a website, if it is still running in the Visual Studio debugger, we can simply right-click the panel in the Office application and reload it to see our changes. Clicking the new button will update the document depending on the content of the text input. �
Result Status and Handling Errors
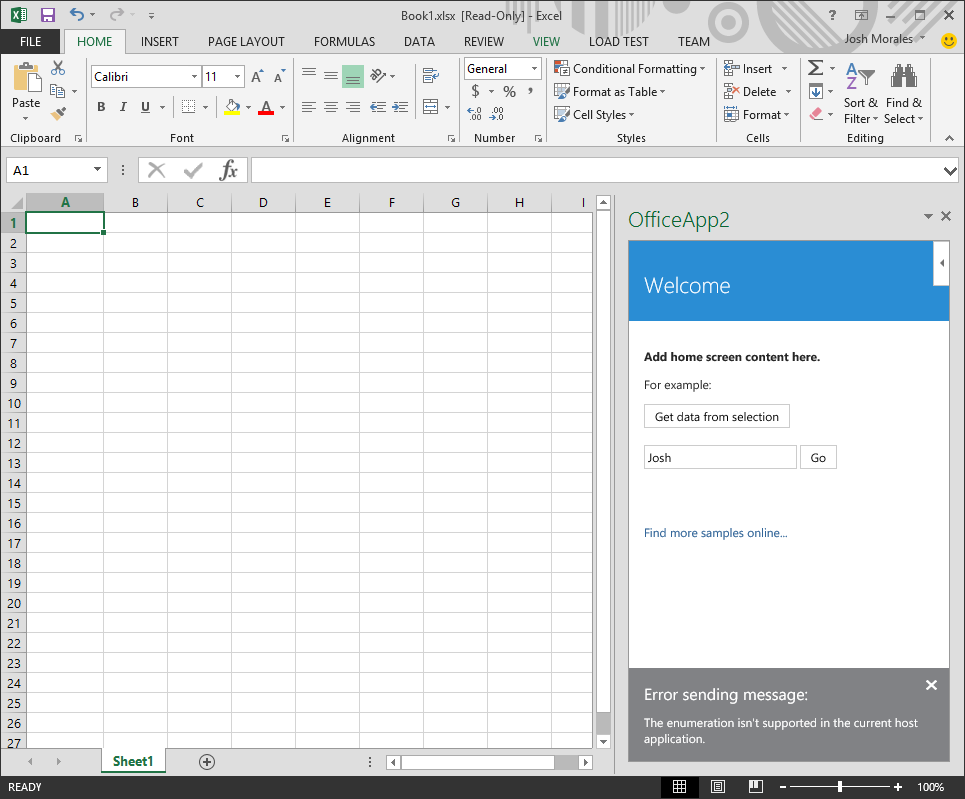
As mentioned before, the callback function exposes a result, so we can attach additional behavior to the button to display a status message. In this sample code block, I've forced the call to fail by passing an invalid coercion type (which we'll explore in a future post) to reveal how you can handle unexpected errors in your app.
Office.context.document.setSelectedDataAsync(message, { coercionType: Office.CoercionType.Ooxml }, messageCallback);
If a user attempts to perform the now invalid action, instead of simply failing, they're presented with a helpful error message letting them know something went wrong.
Running Apps for Office in Different Applications
As we mentioned in the introduction to Apps for Office, the unified JavaScript API makes it easy to support multiple Office applications from a single application. Since we targeted all of the platforms for this sample, we can indeed launch and run our app on each one simply by changing the startup properties of the app in Visual Studio. �
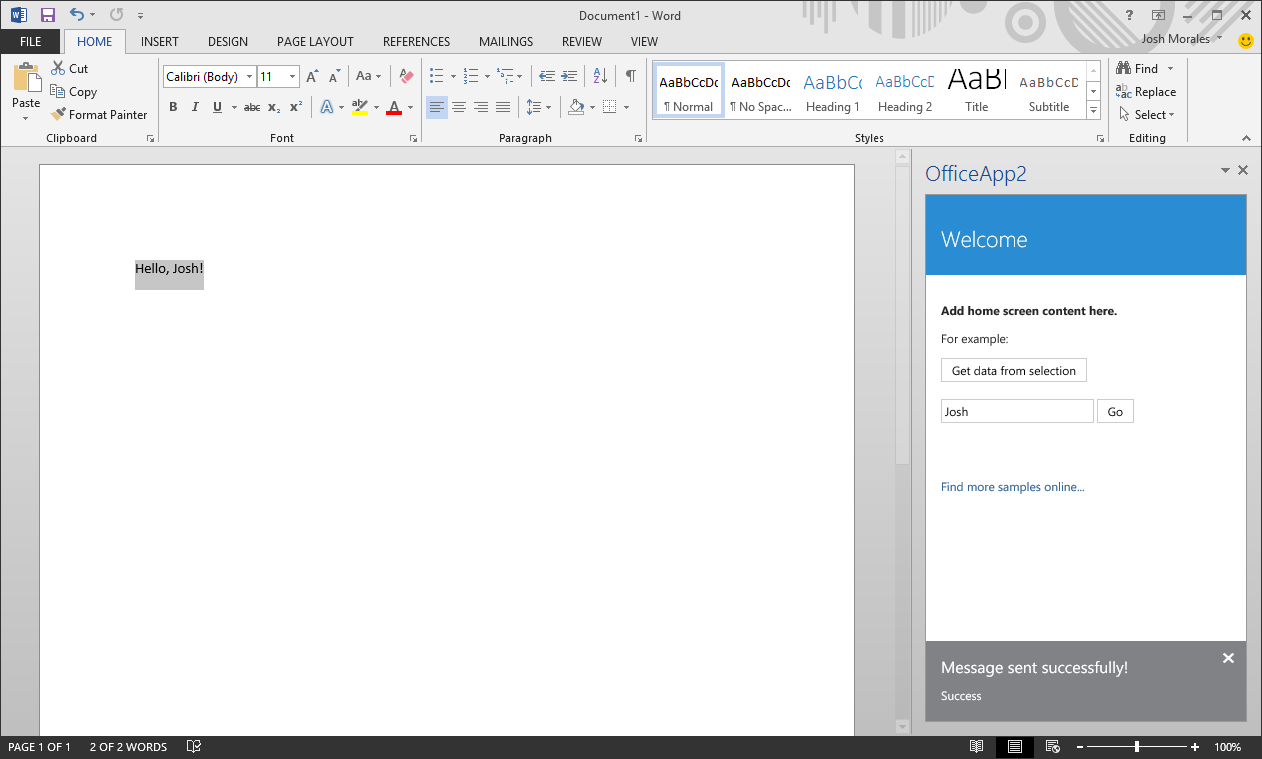
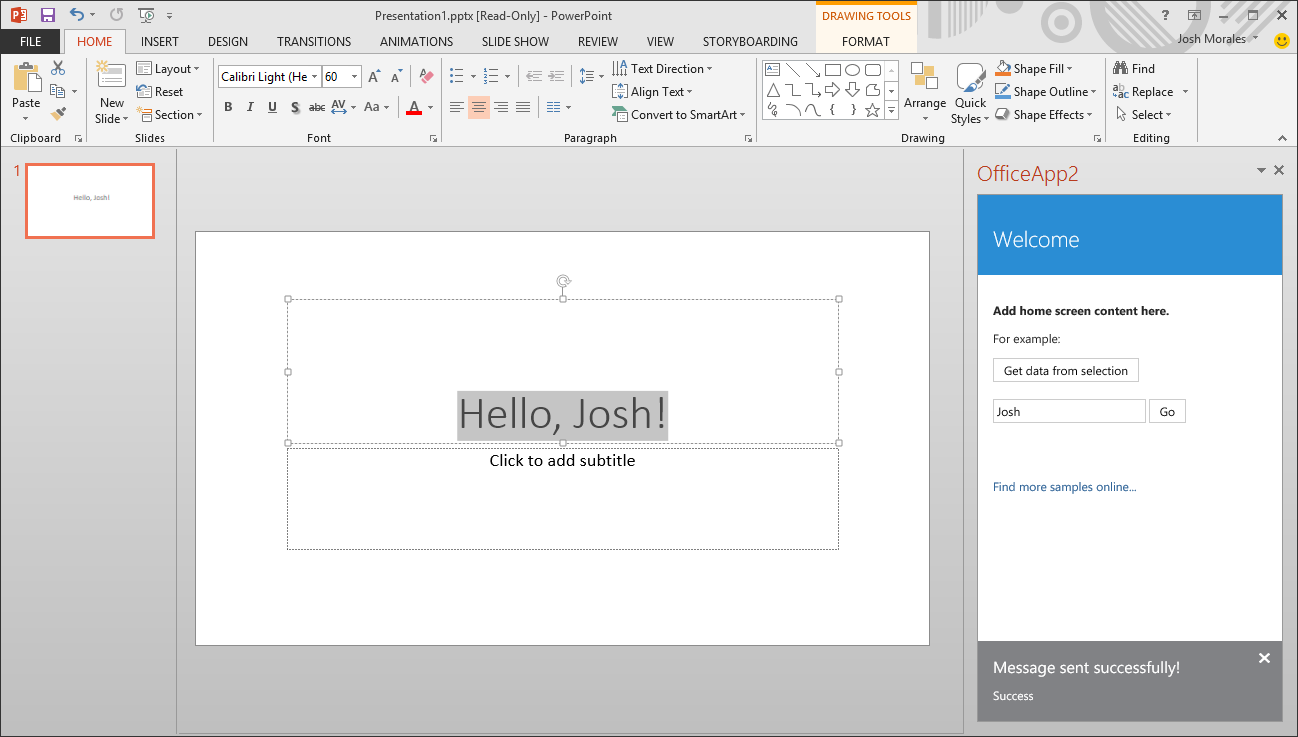
Obviously, there are some API methods that will be available in some applications and not in others, so I highly encourage you to consult the Apps for Office API documentation, especially the API Support Matrix which details what methods and features are available for specific Office applications.
Wrapping Up and Next Steps
Getting started developing Apps for Office is as simple as creating the new project and filling out the web page with your HTML content and JavaScript behavior. With only a few lines of code we were able to achieve two-way interactivity between our app and the document. We can even run this app in several Office applications without changing a single line of code. Later, we'll explore each app type in more detail, creating samples of each and looking closer at some of the additional API methods that are helpful in developing each kind of app. But first, we should explore some of the helpful tools available to test, troubleshoot, and debug your Apps for Office. We'll look at that in our next post.