Rounding out our journey through developing Apps for Office is a quick look at Mail Apps in Compose Mode. This sample continues the same project from our last entry on Read Mode Apps, with a separate folder of content to be shown when composing items in Outlook.
Compose Mode: Item Context
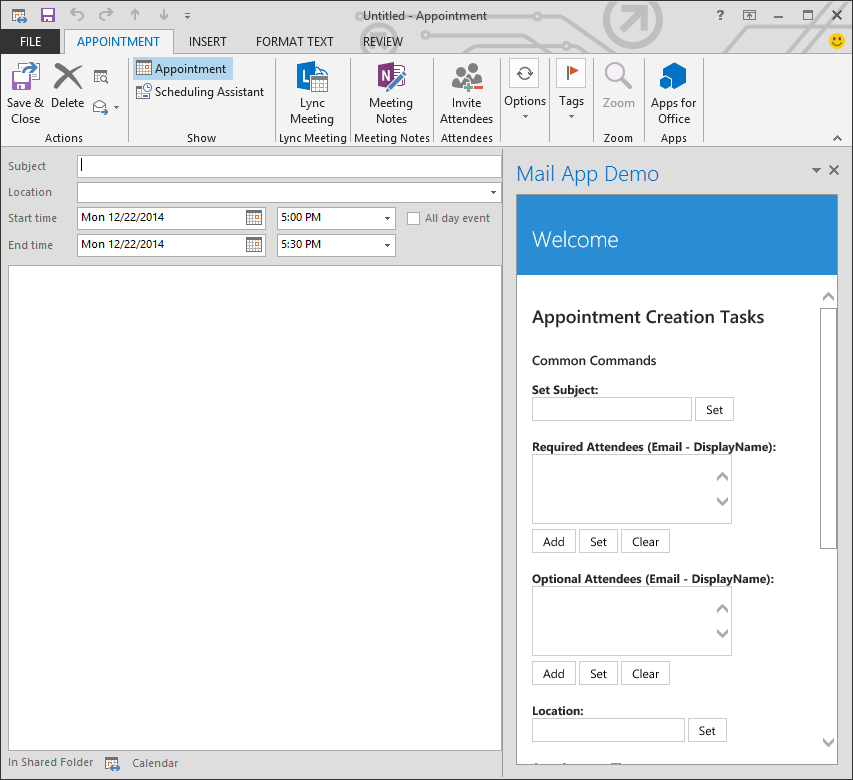
Like the previous example, the apps availability depends on the activation rules, but also on the type of Outlook item to which it is attached. As of this writing, Mail Apps in Compose Mode support both Messages and Appointments, and can be inserted into either item.
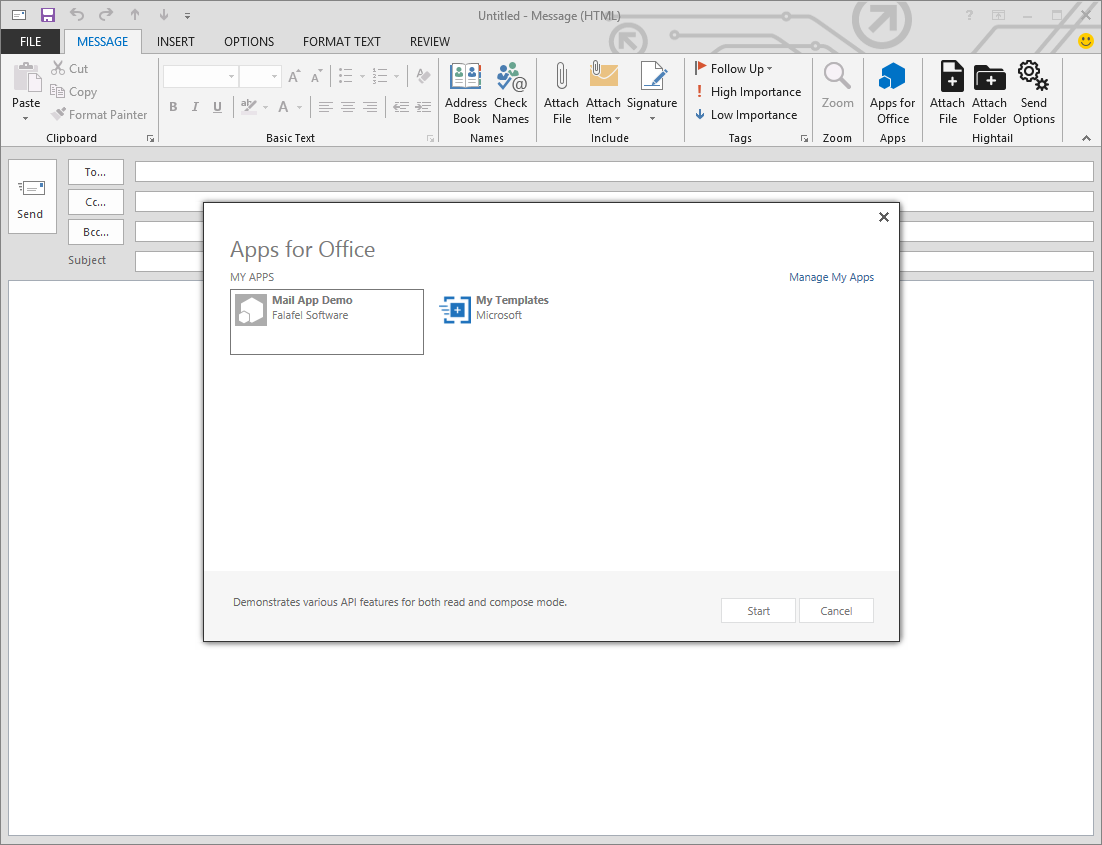
Adding Compose Apps to Outlook items is quite similar to Task Pane apps in that they are installed from the Ribbon menu. If the activation rules support the app, it will appear as an installable app for the item.
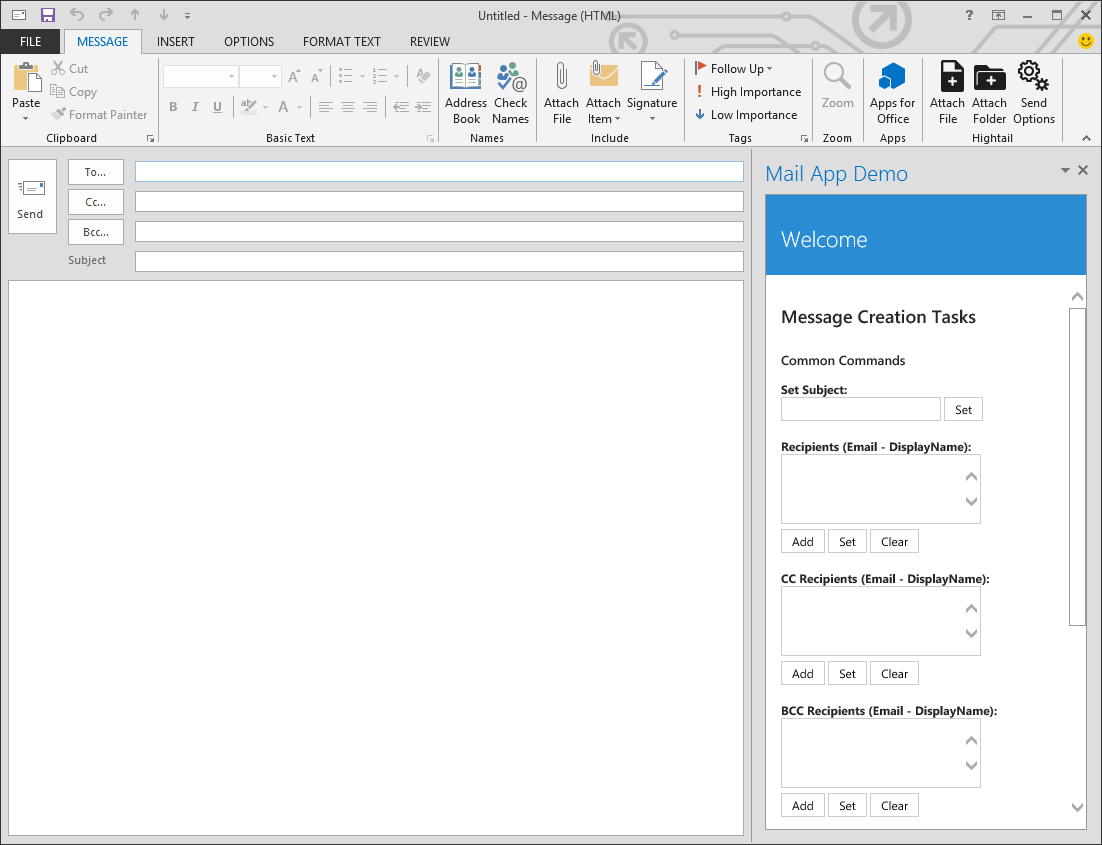
Also like Task Pane apps, Compose Apps appear as a sidebar alongside the message or appointment in which they are installed. Here�s a preview of the sample app from this post in both a Message and Appointment.
Detecting the Outlook Item Type
Since apps can run in both of these item types, it�s important to identify which is the parent type. The sample project template from Visual Studio already demonstrates how you can use the itemType property of the mailbox item.
I�ve modified the code for this sample to set a property on the ViewModel so that we can show and/or hide the sections appropriate to the type of item in which the app is running.
Compose App API
The API available to compose apps is also reminiscent of the Task Pane apps in that it allows you to interact with the associated item. However, these methods allow you to do more than just write to the body of the message or appointment; you are given access to many of the major components of the item, such as the subject, recipients, time and location (for appointments), and even attachments.
All of these methods are exposed using the same asynchronous style as other apps, and therefore are intuitively accessible. Rather than operate on a document object, you instead work with the mailbox � specifically the item object � which adjusts its context based on whether the parent item is a Message or an Appointment.
For our sample app, we�ll create a simple UI to demonstrate the different properties you can manipulate from the app. We�ll start with the HTML that exposes some inputs to receive the content to be inserted or updated, as well as some buttons to trigger the action.
<div class="padding">

����������� <h2 data-bind="visible: isMessage">Message Creation Tasks</h2>

����������� <h2 data-bind="visible: isAppointment">Appointment Creation Tasks</h2>

����������� <h3>Common Commands</h3>

����������� <div class="panel">

��������������� <p>

������������������� <strong>Set Subject:</strong>

������������������� <input id="subject" type="text" />

������������������� <input type="button" value="Set" data-bind="events: { click: setSubject }" />

��������������� </p>

��������������� <div data-bind="visible: isMessage">

������������������� <p>

����������������������� <strong>Recipients (Email - DisplayName):</strong>

����������������������� <textarea id="to-recipients"></textarea>

����������������������� <input type="button" value="Add" data-bind="events: { click: addTo }" />

����������������������� <input type="button" value="Set" data-bind="events: { click: setTo }" />

����������������������� <input type="button" value="Clear" data-bind="events: { click: clearTo }" />

������������������� </p>

�� �����������������<p>

����������������������� <strong>CC Recipients (Email - DisplayName):</strong>

����������������������� <textarea id="cc-recipients"></textarea>

����������������������� <input type="button" value="Add" data-bind="events: { click: addCC }" />

����������������������� <input type="button" value="Set" data-bind="events: { click: setCC }" />

����������������������� <input type="button" value="Clear" data-bind="events: { click: clearCC }" />

������������������� </p>

������������������� <p>

��� ��������������������<strong>BCC Recipients (Email - DisplayName):</strong>

����������������������� <textarea id="bcc-recipients"></textarea>

����������������������� <input type="button" value="Add" data-bind="events: { click: addBCC }" />

���������������� �������<input type="button" value="Set" data-bind="events: { click: setBCC }" />

����������������������� <input type="button" value="Clear" data-bind="events: { click: clearBCC }" />

������������������� </p>

��������������� </div>

��������������� <div data-bind="visible: isAppointment">

������������������� <p>

����������������������� <strong>Required Attendees (Email - DisplayName):</strong>

����������������������� <textarea id="attendees"></textarea>

����������������������� <input type="button" value="Add" data-bind="events: { click: addAttendees }" />

����������������������� <input type="button" value="Set" data-bind="events: { click: setAttendees }" />

����������������������� <input type="button" value="Clear" data-bind="events: { click: clearAttendees }" />

������������������� </p>

������������������� <p>

����������������������� <strong>Optional Attendees (Email - DisplayName):</strong>

����������������������� <textarea id="optionals"></textarea>

����������������������� <input type="button" value="Add" data-bind="events: { click: addOptionals }" />

����������������������� <input type="button" value="Set" data-bind="events: { click: setOptionals }" />

����������������������� <input type="button" value="Clear" data-bind="events: { click: clearOptionals }" />

������������������� </p>

������������������� <p>

����������������������� <strong>Location:</strong>

����������������������� <input id="location" type="text" />

����������������������� <input type="button" value="Set" data-bind="events: { click: setLocation }" />

������������������� </p>

������������������� <p>

����������������������� <strong>Appointment Time:</strong>

����������������������� <input id="startTime" data-role="datetimepicker" type="text" />

����������������������� <input id="endTime" data-role="datetimepicker" type="text" />

����������������������� <input type="button" value="Set" data-bind="events: { click: setTime }" />

������������������� </p>

��������������� </div>

��������������� <p>

������������������� <strong>Body:</strong>

��������� ����������<textarea id="update-body"></textarea>

������������������� <input type="button" value="Prepend" data-bind="events: { click: prependBody }" />

������������������� <input type="button" value="Insert" data-bind="events: { click: insertBody }" />

�� �������������</p>

��������������� <p>

������������������� <strong>Attachment (URL):</strong>

������������������� <input id="add-attachment" type="text" /><br />

������������������� <input type="button" value="Add" data-bind="events: { click: addAttachment }" />

������������������� <input type="button" value="Remove" data-bind="visible: hasAttachment, events: { click: removeAttachment }" />

��������������� </p>

��������������� <p>

������������������� <strong>Attach Message (EWS):</strong>

����������������� ��<input type="button" value="Attach" data-bind="events: { click: attachItem }" />

������������������� <input type="button" value="Remove" data-bind="visible: hasItem, events: { click: removeItem }" />

��������������� </p>

����������� </div>

������� </div>
For each input, we simply need to pass the value to the appropriate method on the corresponding property to either set the value (such as a subject) or add to it (such as a recipient list). For example, to set the subject, we�d use this code:
setSubject: function () {

����������� var subject = $("#subject").val();

����������� if (subject === "") return;

����������� Office.context.mailbox.item.subject.setAsync(subject, { asyncContext: { length: subject.length } }, setTextCallback);

������� },
Here we set a list of recipients (line-separated from the text area):
addTo: function () {

����������� // get list of contacts

����������� var recipients = getRecipients($("#to-recipients").val());

����������� if (!recipients.length) return;

����������� // add contacts to list

����������� Office.context.mailbox.item.to.addAsync(recipients, { asyncContext: { count: recipients.length } }, setListCallback);

������� },

// ...

��� function getRecipients(text) {

������� var recipients = [];

����� ��// split text into lines

������� var lines = text.split("\n");

������� if (!lines.length) return recipients;

������� // split lines into emails and optional display name

������� $.each(lines, function (i, v) {

����������� var contact = v.split("-");

����������� // handle blank display name

����������� if (contact.length === 1)

��������������� contact[1] = "";

����������� // add to list of recipients

����������� recipients.push({ emailAddress: $.trim(contact[0]), displayName: $.trim(contact[1]) });

������� });

������� return recipients;

��� }
Notice here that the setAsync method accepts an array of the EmailAddressDetails object to identify the email, display name, and type of the recipient.
We can also append items with the addAsync property available for lists like To, CC, and BCC as well as appointment attendees both required and optional. Here are some samples, and of course the full implementation is available in the downloadable project below.
addCC: function () {

����������� // get list of contacts

����������� var recipients = getRecipients($("#cc-recipients").val());

����������� if (!recipients.length) return;

����������� // add contacts to list

����������� Office.context.mailbox.item.cc.addAsync(recipients, { asyncContext: { count: recipients.length } }, setListCallback);

������� },

������� setCC: function () {

����������� // get list of contacts

����������� var recipients = getRecipients($("#cc-recipients").val());

����������� if (!recipients.length) return;

����������� // add contacts to list

����������� Office.context.mailbox.item.cc.setAsync(recipients, { asyncContext: { count: recipients.length } }, setListCallback);

������� },

������� clearCC: function() {

����������� Office.context.mailbox.item.cc.setAsync([], { asyncContext: { count: 0 } }, setListCallback);

������� },

������� addBCC: function () {

����������� // get list of contacts

����������� var recipients = getRecipients($("#bcc-recipients").val());

����������� if (!recipients.length) return;

����������� // add contacts to list

����������� Office.context.mailbox.item.bcc.addAsync(recipients, { asyncContext: { count: recipients.length } }, setListCallback);

������� },

������� setBCC: function () {

����������� // get list of contacts

����������� var recipients = getRecipients($("#bcc-recipients").val());

����������� if (!recipients.length) return;

����������� // add contacts to list

����������� Office.context.mailbox.item.bcc.setAsync(recipients, { asyncContext: { count: recipients.length } }, setListCallback);

������� },

������� clearBCC: function() {

����������� Office.context.mailbox.item.bcc.setAsync([], { asyncContext: { count: 0 } }, setListCallback);

������� },
When writing to the body, you can either insert content at the current selection (using the familiar setSelectedDataAsync) or use the handy prependAsync to insert content at the very beginning (which is useful for selecting and inserting greetings programmatically).
prependBody: function () {

����������� var body = $("#update-body").val();

����������� if (body === "") return;

����������� Office.context.mailbox.item.body.prependAsync(body, { asyncContext: { length: body.length } }, setTextCallback);

������� },

������� insertBody: function() {

����������� var body = $("#update-body").val();

����������� if (body === "") return;

����������� Office.context.mailbox.item.body.setSelectedDataAsync(body, { asyncContext: { length: body.length } }, setTextCallback);

������� },
Note: although this sample doesn�t demonstrate it, each mailbox item property also exposes a similar getAsync method to retrieve values from the item if needed for processing by your app.
Appointment Time
Because an appointment has both a start and end time, these properties need to be set separately via their respective asynchronous methods. Because they are asynchronous, we need to chain them through the callback function so that we can set first one, then the other, which we retrieve from the Kendo UI DateTimePicker widget on our UI:
setTime: function (e) {

����������� var start = $("#startTime").data("kendoDateTimePicker");

����������� var end = $("#endTime").data("kendoDateTimePicker");

����������� Office.context.mailbox.item.start.setAsync(start.value(), { start: start.value(), end: end.value() }, function () {

��������������� Office.context.mailbox.item.end.setAsync(end.value());

����������� });

������� },
There is also a handy method convertToUtcClientTime that accepts a dictionary of time values (year, month, day, etc.) that returns a Date object to help when setting times on the appointment.
Attachments
Concluding the list of API features available to Compose Apps is the ability to add attachments to the item, which can be appended to both mailbox item types. Rather than using the file system, the API method allows you to either attach files via a URI (downloading and attaching them to the item) or to retrieve them from the user�s mailbox via Exchange Web Services (EWS).
Adding and Removing Attachments via URI
Attaching a remote file is accomplished quite easily using the addFileAttachmentAsync method, which accepts both the URI and a filename shown upon insertion. The callback method then contains an asyncResult with the value property populated with a unique ID for the attachment. This ID can then be used to remove the attachment via the removeAttachmentAsync, which accepts (as the parameter), the ID of the attachment when it was inserted.
Here is the code for the sample project which accomplishes this using an attachmentID property on the ViewModel to store the inserted attachment.
addAttachment: function (e) {

����������� if (vm.hasAttachment) {

��������������� app.showNotification("Error", "There is already an attachment. Please remove it before trying again.");

��������������� return;

����������� }

����������� var attachmentURI = $("#add-attachment").val();

����������� if (attachmentURI === "") return;

����������� var parts = attachmentURI.split("/");

����������� if (parts.length < 2) return;

����������� var name = parts[parts.length - 1];

����������� Office.context.mailbox.item.addFileAttachmentAsync(

���������� attachmentURI,

���������� name,

���������� { asyncContext: name },

���������� function (asyncResult) {

����������� if (asyncResult.status == Office.AsyncResultStatus.Failed) {

��������������� app.showNotification("Error", asyncResult.error.message);

����������� }

����������� else {

��������������� // Get the ID of the attached file.

��������������� vm.set("attachmentID", asyncResult.value);

��������������� app.showNotification("Success", "Attachment " + "'" + asyncResult.asyncContext + "' added!");

����������� }

���������� });

������� },
Obviously this means our app only supports insertion and removal of a single attachment, but this could easily be modified to support multiple attachments.
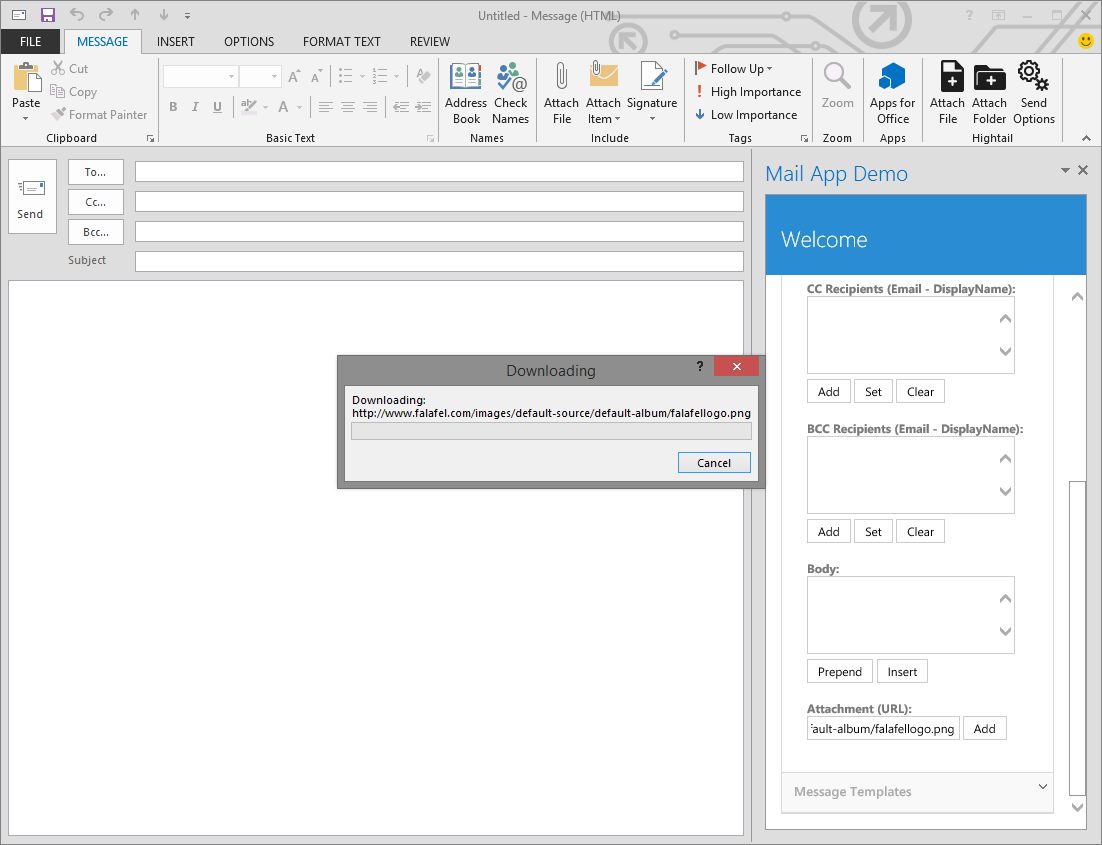
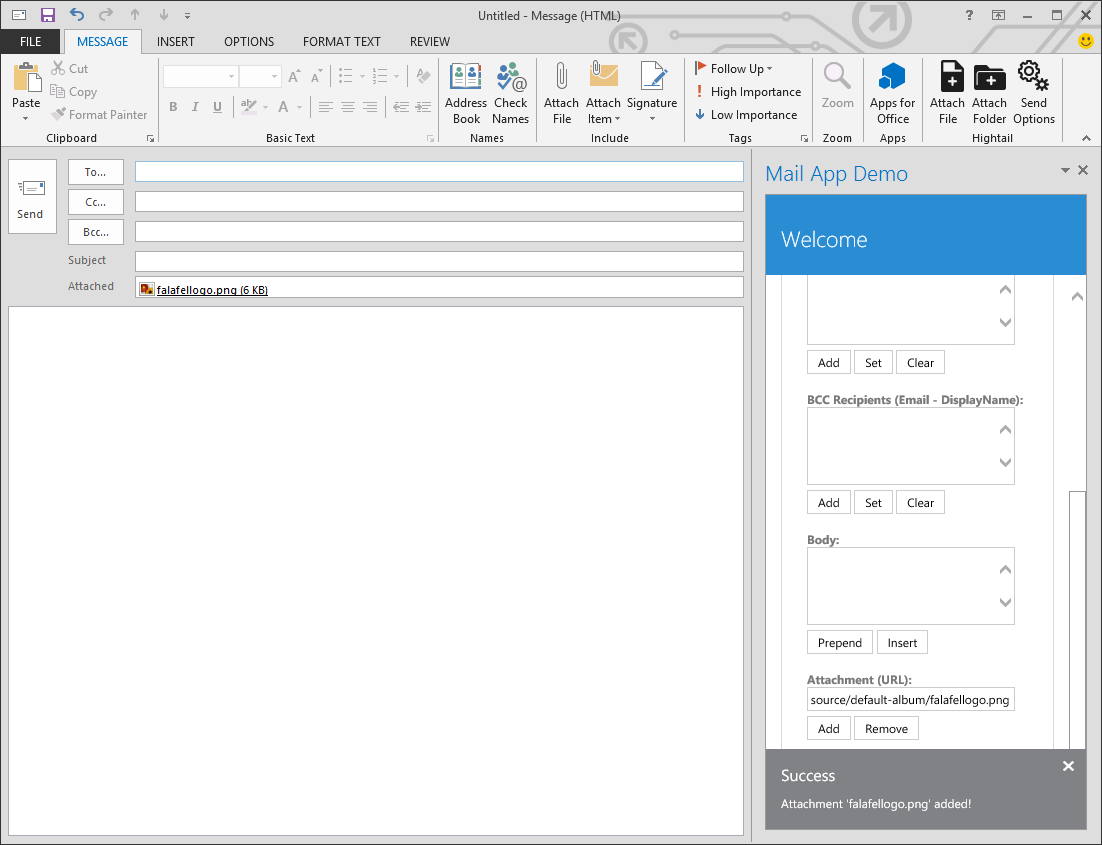
When we enter a URI to the app (in this case the path to the Falafel logo on our website), the app downloads the file and attaches it to the item, ready to be sent.
Conversely, removing the attachment clears it from the item.
Adding and Removing Mailbox Item Attachments (EWS)
Just like Read Mode Apps, Compose Apps allow you to interact with EWS to retrieve and publish user information. However, remember that in order to do this, your app must include and request the permission to �Read write mailbox� in the app manifest.
Once again, working with EWS is outside the scope of this article, but the sample app does demonstrate how to search the user�s mailbox for a message by subject. In this case, we�re searching for the same message from the Read Mode sample (�Let�s have lunch�), the text of which we use to create the SOAP request.
function getFindRequest(query) {

������� return '<?xml version="1.0" encoding="utf-8"?> \

��������������� <soap:Envelope xmlns:xsi="http://www.w3.org/2001/XMLSchema-instance"� \

����������������������� xmlns:m="http://schemas.microsoft.com/exchange/services/2006/messages"� \

����������������������� xmlns:t="http://schemas.microsoft.com/exchange/services/2006/types"� \

����������������������� xmlns:soap="http://schemas.xmlsoap.org/soap/envelope/"> \

����������������� <soap:Header> \

������������������� <t:RequestServerVersion Version="Exchange2010" /> \

��������� ��������</soap:Header> \

��������������� <soap:Body> \

������������������� <m:FindItem Traversal="Shallow"> \

������������������� <m:ItemShape> \

����������������������� <t:BaseShape>IdOnly</t:BaseShape> \

����������������������� <t:AdditionalProperties> \

��������������������������� <t:FieldURI FieldURI="item:Subject" /> \

����������������������� </t:AdditionalProperties> \

������������������� </m:ItemShape> \

������������������� <m:IndexedPageItemView MaxEntriesReturned="1" Offset="0" BasePoint="Beginning" /> \

������������������� <m:ParentFolderIds> \

����������������������� <t:DistinguishedFolderId Id="inbox" /> \

������������������� </m:ParentFolderIds> \

������������������� <m:QueryString>subject:' + query + '</m:QueryString> \

������������������� </m:FindItem> \

��������������� </soap:Body> \

��������������� </soap:Envelope>';

��� }
The request is then sent via the makeEwsRequestAsync method, which returns the result as an XML string. We ignored this result last time (since we were only posting the item as a �fire and forget�), but since we are doing this to get the item ID, we need to parse the XML to locate the desired message ID and use that to finally create the attachment by passing it to the addItemAttachmentAsync method.
attachItem: function () {

����������� // search mailbox for item

����������� var request = getFindRequest("Let's have lunch");

����������� Office.context.mailbox.makeEwsRequestAsync(request, function (result) {

��������������� if (result.status !== "succeeded") {

������ �������������app.showNotification("Error", "Unable to add task. Please check permissions");

������������������� return;

��������������� }

��������������� // extract Id from XML result

��������������� var xml = $.parseXML(result.value);

��������������� var idNodeElements = xml.getElementsByTagName("t:ItemId");

��������������� var idNode = idNodeElements[0];

��������������� var id = idNode.attributes["Id"].value;

��������������� var subjectNodeElements = xml.getElementsByTagName("t:Subject");

�������������� �var subject = subjectNodeElements[0].textContent;

��������������� // call API to attach item with ID

��������������� Office.context.mailbox.item.addItemAttachmentAsync(id, subject, { asyncContext: null }, function (attachResult) {

������������������� vm.set("itemID", attachResult.value);

������������������� app.showNotification("Item Added", "Mailbox item attached.");

��������������� });

����������� });

������� },
Just like before, the callback contains a result with the uniquely generated ID of the attachment so that it can later be removed programmatically if desired.
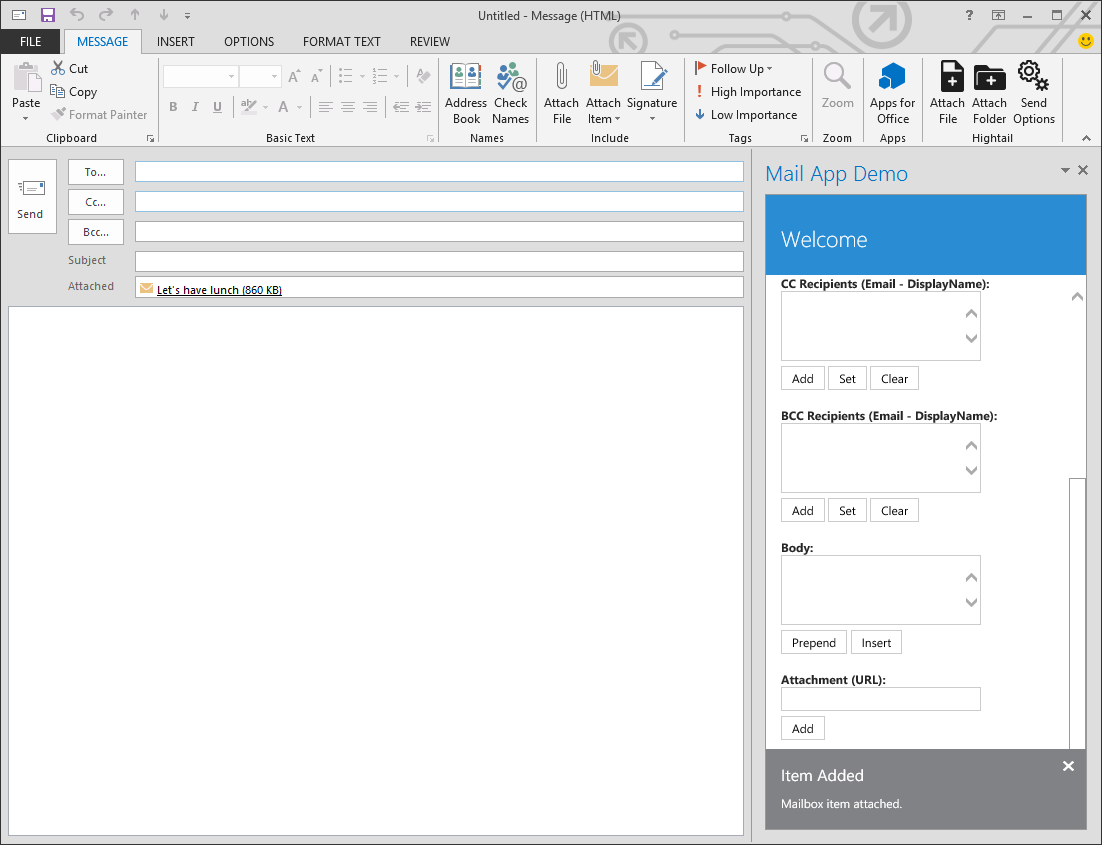
In the live demo, pushing the button retrieves the desired message from my inbox and attaches it to the item.
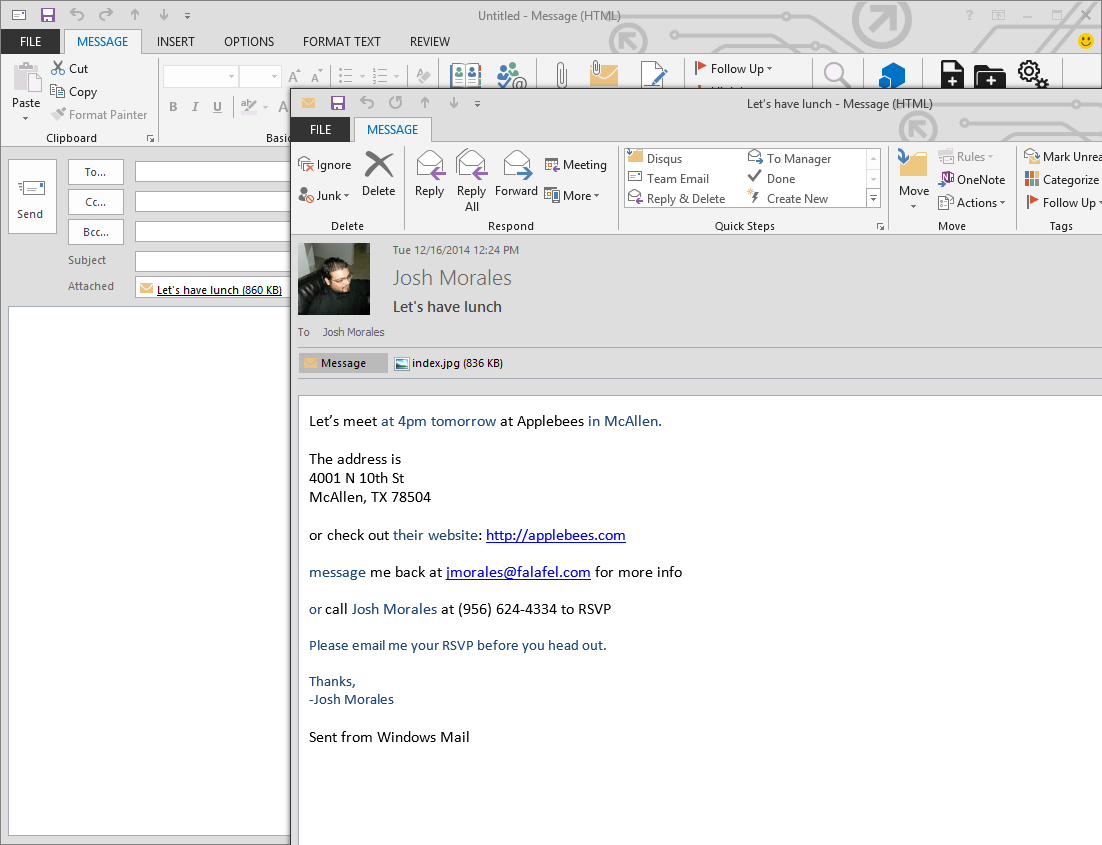
Opening the attachment reveals that it is indeed the expected message.
Wrapping Up and Next Steps
We have at last completed our basic tour through the various types of Apps for Office, including Task Pane, Content, and now Mail Apps. The Compose Apps offer similar functionality to the previous app types, allowing you to get or set important properties of the mailbox item, as well as content specific to the item type such as location and even attachments.
In our final upcoming post in the series we�ll review some of the different ways to publish your app for both public and internal use.