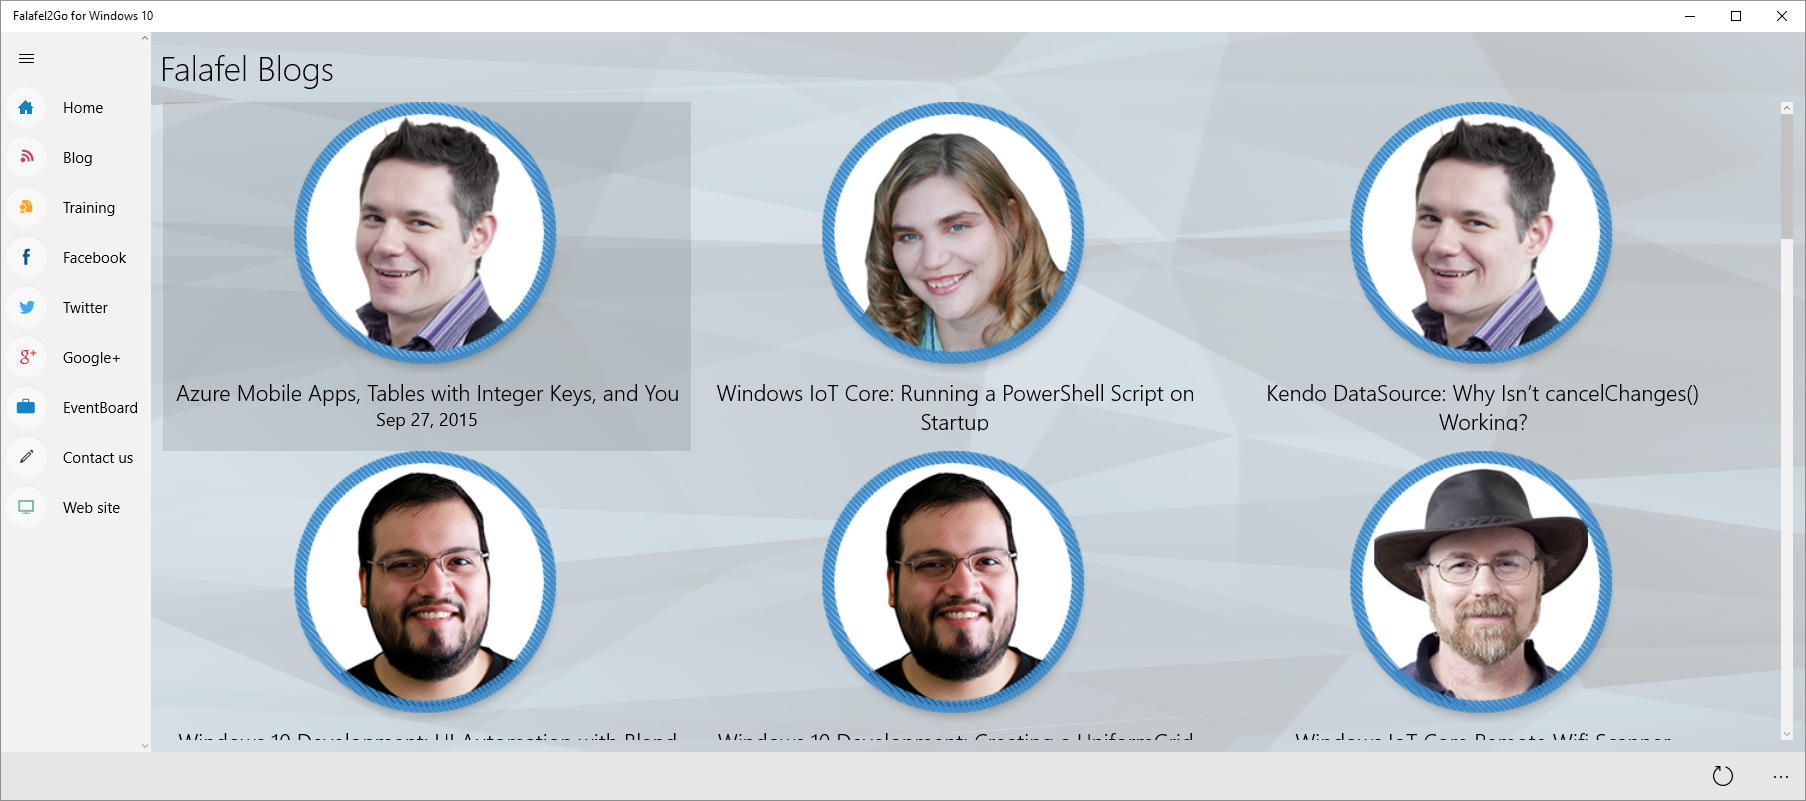
We've seen how the Windows 10 AdaptiveTrigger can help you create a dynamic responsive UI based on the height or width of the device or screen. However, this trigger is limited to a specific value for each dimension, and offers no way to respond to changes in the relationship between them, such as to determine the orientation or aspect ratio of the app.
Fortunately, you are not limited to only the AdaptiveTrigger in Windows 10; you can�create your own custom statetriggers based on virtually any property, even those not at all related to the UI. In this post, we'll look at how we combined both the width and orientation properties of the app to create a custom�OrientationSize trigger to switch between�visual states using these properties.
StateTriggerBase
Custom triggers in Windows 10 inherit from�StateTriggerBase�which exposes the key method�SetActive(). This method�accepts�a boolean parameter indicating whether or not the associated VisualState should be activated.
The�custom trigger simply needs to call this method, passing in whatever value is appropriate based on any condition or custom code to which the app has access, including window size, network connectivity, time of day, etc.
In our case, we are concerned with both the Orientation and the Window size, the cross product of which results in six possible options. I've encapsulated these values into a custom enumeration:
public enum OrientationSize

{

��� NarrowPortrait,

��� NarrowLandsape,

��� Portrait,

��� Landscape,

��� WidePortrait,

��� WideLandscape

}
The goal is to create a trigger that can identify if it is in one of these states so that the layout can adjust accordingly. We begin then by inheriting from the required base class, with a property that represents the desired orientation enumeration value for the trigger:
public class OrientationSizeTrigger : StateTriggerBase

{

������ public OrientationSize Orientation { get; set; }

}
Now, the trigger we create obviously needs to be able to respond to changes in the application size. This can be done by listening to the SizeChanged event of the current window, wired up in the constructor:
public OrientationSizeTrigger()

{

��� Window.Current.SizeChanged += Current_SizeChanged;

}

private void Current_SizeChanged(object sender, Windows.UI.Core.WindowSizeChangedEventArgs e)

{

��� SetTrigger();

}
Any change in the window size or orientation will launch a custom method which I've called�SetTrigger to compare the current state of the window size to the state required by the defined trigger instance properties:
private void SetTrigger()

{

��� var currentView = ApplicationView.GetForCurrentView();

��� bool active = false;

��� switch (Orientation)

��� {

������� case OrientationSize.NarrowPortrait:

����������� active = currentView.Orientation == ApplicationViewOrientation.Portrait && currentView.VisibleBounds.Width <= 720;

�� ���������break;

������� case OrientationSize.NarrowLandsape:

����������� active = currentView.Orientation == ApplicationViewOrientation.Landscape && currentView.VisibleBounds.Width <= 720;

����������� break;

������� case OrientationSize.Portrait:

������ �����active = currentView.Orientation == ApplicationViewOrientation.Portrait && currentView.VisibleBounds.Width > 720 && currentView.VisibleBounds.Width <= 1280;

����������� break;

������� case OrientationSize.Landscape:

����������� active = currentView.Orientation == ApplicationViewOrientation.Landscape && currentView.VisibleBounds.Width > 720 && currentView.VisibleBounds.Width <= 1280;

����������� break;

������� case OrientationSize.WidePortrait:

����������� active = currentView.Orientation == ApplicationViewOrientation.Portrait && currentView.VisibleBounds.Width > 1280;

����������� break;

������� case OrientationSize.WideLandscape:

����������� active = currentView.Orientation == ApplicationViewOrientation.Landscape && currentView.VisibleBounds.Width > 1280;

����������� break;

��� }

��� this.SetActive(active);

}
Here I've used the three threshold values of 0, 720, and 1280 to define the boundaries of the different sizes, combined with�the existing Orientation property of the ApplicationView state to determine the overall state of the application. If it is a match for the trigger's expected property, we set the associated VisualState to be active.
Although we have defined six possible states, as we saw in our last post, we only need three for the different states of Falafel2Go for small, medium, and wide views. However, as we also saw the views aren't defined strictly by the width or height; the screen could be small but also landscape, in which case we do not want to use a vertical layout.
Instead, we can simply combine the states, mixing and matching their arrangements to properly enable the states that layout the app properly given the resulting state.
Here's the XAML that does exactly that:
<VisualStateManager.VisualStateGroups>

<VisualStateGroup x:Name="OrientationStates">

��� <VisualState x:Name="NarrowState">

������� <VisualState.StateTriggers>

����������� <triggers:OrientationSizeTrigger Orientation="NarrowPortrait"/>

����������� <triggers:OrientationSizeTrigger Orientation="WidePortrait"/>

������� </VisualState.StateTriggers>

������� <VisualState.Setters>

����������� <Setter Target="MainPanel.(RelativePanel.AlignRightWithPanel)" Value="True" />

����������� <Setter Target="MainPanel.ItemsPanel">

��������������� <Setter.Value>

������������������� <ItemsPanelTemplate>

����������������������� <ctrl:UniformGrid Columns="2" Orientation="Horizontal" />

������������������� </ItemsPanelTemplate>

��������������� </Setter.Value>

����������� </Setter>

����������� <Setter Target="OtherActivitiesPanel.(RelativePanel.Below)" Value="MainPanel" />

����������� <Setter Target="OtherActivitiesPanel.(RelativePanel.RightOf)" Value="" />

������� </VisualState.Setters>

��� </VisualState>

��� <VisualState x:Name="LandscapeState">

������� <VisualState.StateTriggers>

��������� ��<triggers:OrientationSizeTrigger Orientation="NarrowLandsape"/>

����������� <triggers:OrientationSizeTrigger Orientation="Landscape"/>

������� </VisualState.StateTriggers>

������� <VisualState.Setters>

����������� <Setter Target="MainPanel.(RelativePanel.AlignRightWithPanel)" Value="False" />

����������� <Setter Target="MainPanel.ItemsPanel">

��������������� <Setter.Value>

������������������� <ItemsPanelTemplate>

����������������������� <ctrl:UniformGrid Rows="2" Orientation="Vertical" />

��������������� ����</ItemsPanelTemplate>

��������������� </Setter.Value>

����������� </Setter>

����������� <Setter Target="OtherActivitiesPanel.ItemsPanel">

��������������� <Setter.Value>

������������������� <ItemsPanelTemplate>

����������������������� <ctrl:UniformGrid Rows="3" Orientation="Vertical"/>

������������������� </ItemsPanelTemplate>

��������������� </Setter.Value>

����������� </Setter>

����������� <Setter Target="OtherActivitiesPanel.(RelativePanel.AlignRightWithPanel)" Value="True" />

����������� <Setter Target="OtherActivitiesPanel.(RelativePanel.Below)" Value="" />

����������� <Setter Target="OtherActivitiesPanel.(RelativePanel.RightOf)" Value="MainPanel" />

������� </VisualState.Setters>

��� </VisualState>

��� <VisualState x:Name="WideState">

������� <VisualState.StateTriggers>

����������� <triggers:OrientationSizeTrigger Orientation="WideLandscape" />

������� </VisualState.StateTriggers>

������� <VisualState.Setters>

����������� <Setter Target="MainPanel.(RelativePanel.AlignRightWithPanel)" Value="False" />

����������� <Setter Target="MainPanel.ItemsPanel">

��������������� <Setter.Value>

������������������� <ItemsPanelTemplate>

����������������������� <ctrl:UniformGrid Rows="2" Orientation="Vertical" />

������������������� </ItemsPanelTemplate>

������������ ���</Setter.Value>

����������� </Setter>

����������� <Setter Target="OtherActivitiesPanel.ItemsPanel">

��������������� <Setter.Value>

������������������� <ItemsPanelTemplate>

����������������������� <ctrl:UniformGrid Rows="2" Orientation="Vertical" />

��� ����������������</ItemsPanelTemplate>

��������������� </Setter.Value>

����������� </Setter>

����������� <Setter Target="OtherActivitiesPanel.(RelativePanel.AlignRightWithPanel)" Value="True" />

����������� <Setter Target="OtherActivitiesPanel.(RelativePanel.Below)" Value="" />

����������� <Setter Target="OtherActivitiesPanel.(RelativePanel.RightOf)" Value="MainPanel" />

������� </VisualState.Setters>

��� </VisualState>

</VisualStateGroup>

</VisualStateManager.VisualStateGroups>
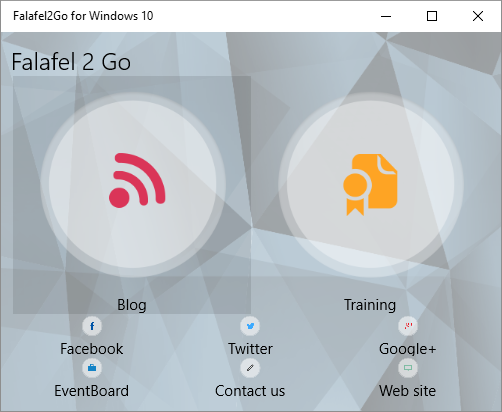
Notice here that we combine the the layouts that make sense (such as Landscape and NarrowLandscape) while separating out the unique WideLandscape to accommodate the unique, full-screen desktop views, like the tiled view for blogs:

You might be wondering why there isn't an entry for the regular Portrait enumeration; the reason this is missing is that this is the "default" state of the XAML page, so if none of the triggers are satisfied, it will fall back to that state, completing all of the possible required views for the app.
Firing Triggers on Startup with Dependency Properties
There's still one last missing piece of the puzzle here, which you will discover if you exit the app while not in the default ("Portrait") state. Exiting a Windows 10 app preserves the window size and orientation for the next launch. As you recall, the default state for our app is Portrait, and we only update our custom triggers when the window is resized.
This means that if we exit our app in a different VisualState, then relaunch it, it will attempt to restore the default "Portrait" state, even though that state is not correct for the launched orientation, resulting in an unexpected layout:

You might think, as I sure did, that the fix is to simply force the trigger to evaluate in the constructor:
public OrientationSizeTrigger()

��� {

������� Window.Current.SizeChanged += Current_SizeChanged;

������� SetTrigger();

��� }
Unfortunately this does not appear to be the correct fix, as in my testing, the�Orientation property appeared to be fixed to the default, first value of the enumeration (in this case "NarrowPortrait") for all of the triggers, disregarding what we set in the XAML properties.
The reason for this is that we need to instead configure our trigger to rely on Dependency Properties which, as previously discussed, contain all the plumbing and infrastructure to manage binding at runtime.
Replacing our OrientationSize with an implentation using Dependecy Properties, and using the changed event to call the trigger yields the following complete definition for our custom trigger:
public class OrientationSizeTrigger : StateTriggerBase

{

��� public OrientationSizeTrigger()

��� {

������� Window.Current.SizeChanged += Current_SizeChanged;

��� }

��� private void Current_SizeChanged(object sender, Windows.UI.Core.WindowSizeChangedEventArgs e)

��� {

������� var result = SetTrigger(Orientation);

������� SetActive(result);

��� }

��� private static bool SetTrigger(OrientationSize orientation)

��� {

������� if (GalaSoft.MvvmLight.ViewModelBase.IsInDesignModeStatic) return false;

������� var currentView = ApplicationView.GetForCurrentView();

������� bool active = false;

������� switch (orientation)

������� {

����������� case OrientationSize.NarrowPortrait:

��������������� active = currentView.Orientation == ApplicationViewOrientation.Portrait && currentView.VisibleBounds.Width <= 720;

��������������� break;

����������� case OrientationSize.NarrowLandsape:

��������������� active = currentView.Orientation == ApplicationViewOrientation.Landscape && currentView.VisibleBounds.Width <= 720;

��������������� break;

����������� case OrientationSize.Portrait:

��������������� active = currentView.Orientation == ApplicationViewOrientation.Portrait && currentView.VisibleBounds.Width > 720 && currentView.VisibleBounds.Width <= 1280;

���������� �����break;

����������� case OrientationSize.Landscape:

��������������� active = currentView.Orientation == ApplicationViewOrientation.Landscape && currentView.VisibleBounds.Width > 720 && currentView.VisibleBounds.Width <= 1280;

��������������� break;

����������� case OrientationSize.WidePortrait:

��������������� active = currentView.Orientation == ApplicationViewOrientation.Portrait && currentView.VisibleBounds.Width > 1280;

��������������� break;

����������� case OrientationSize.WideLandscape:

������ ���������active = currentView.Orientation == ApplicationViewOrientation.Landscape && currentView.VisibleBounds.Width > 1280;

��������������� break;

������� }

������� return active;

��� }

��� public OrientationSize Orientation

��� {

������� get { return (OrientationSize)GetValue(OrientationSizeProperty); }

������� set { SetValue(OrientationSizeProperty, value); }

��� }

��� public DependencyProperty OrientationSizeProperty = DependencyProperty.Register("OrientationSize", typeof(OrientationSize), typeof(OrientationSizeTrigger), new PropertyMetadata(OrientationSize.NarrowPortrait, OnOrientationSizeChanged));

��� private static void OnOrientationSizeChanged(DependencyObject sender, DependencyPropertyChangedEventArgs args)

��� {

������� var trigger = (OrientationSizeTrigger)sender;

������� var newVal = (OrientationSize)args.NewValue;

������� var result = SetTrigger(newVal);

������� trigger.SetActive(result);

��� }

}
� Note that I've pre-fixed the SetTrigger method with the�design detection feature of MvvmLight to avoid throwing any errors in the designer.
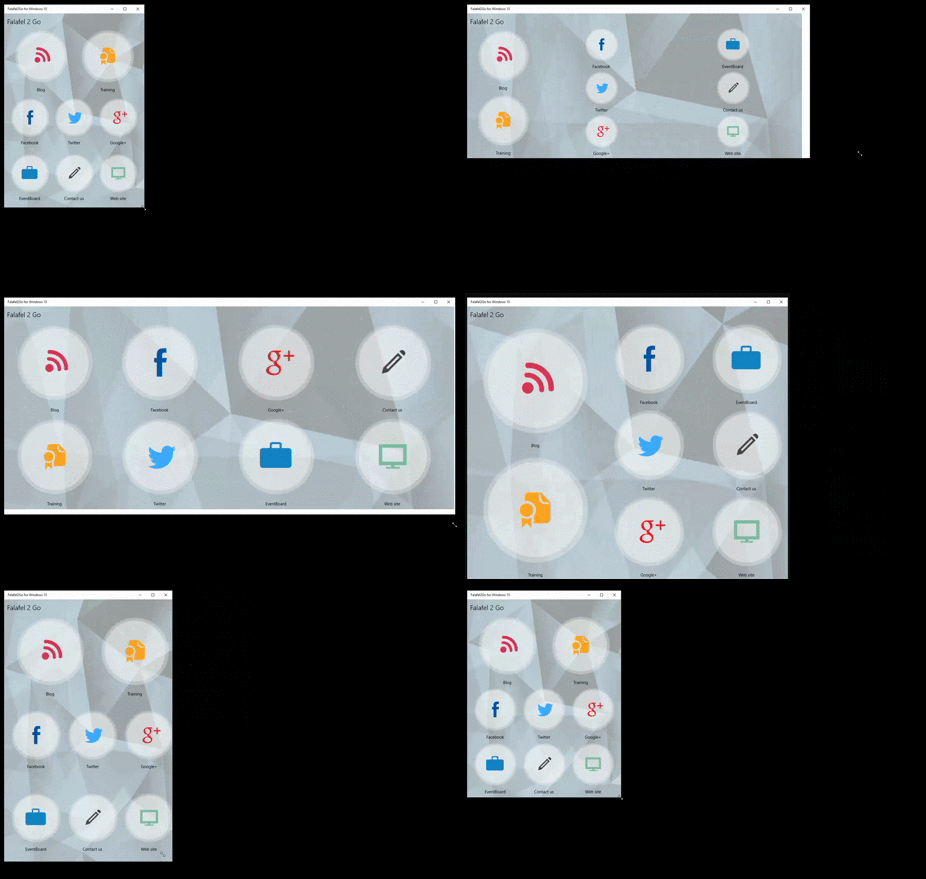
With that, we've completed the custom trigger that allows the fully dynamic, responsive layout of Falafel2Go (click to open and animate the GIF):

We applied the same triggers in different combinations throughout Falafel2Go to achieve the different layouts required, automatically triggered by any change in device or screen orientation.
Wrapping Up and Next Steps
Custom triggers allow your Windows 10 applications to respond to a wide variety of conditions to create dynamic, responsive layouts. Whether it's simply reflowing the UI to accommodate different sizes and orientations, or responding to changes in network connectivity, these triggers help your apps feel more alive, and more importantly, in-tune to your user's expectations and experiences.
With this post we've completed a trip through the basics of app development, from setting up an MVVM framework, to managing state and lifecycle, to the different UI controls and strategies for adapting your layout, and is everything you need to build a simple app for Windows 10.
In our next round of posts, we'll take a look at more advanced topics, really diving into the platform-specific features of Windows 10, including Live Tiles, background tasks, local storage, and even cloud services like push notifications and mobile apps.
If there's any topic you'd like to see be sure and sound off in the comments, and of course, we at Falafel would be glad to work with you on your next Windows 10 project! Take a look at our consulting and training packages today and let us help you take your Windows apps to the next level.
As always, I hope this first round of posts has been helpful, stay tuned for more and thanks for reading!